
PART 1
Connect SmarterContact and send your records.
My name is Kylie, and I'm your customer support manager at REI Sift. In this video, I'll be showing you how to set up the outbound SmarterContact integration. It lets you send records directly from REI Sift to SmarterContact, so we start in Settings and finish on the send screen.
Connect, then send records by phone number.
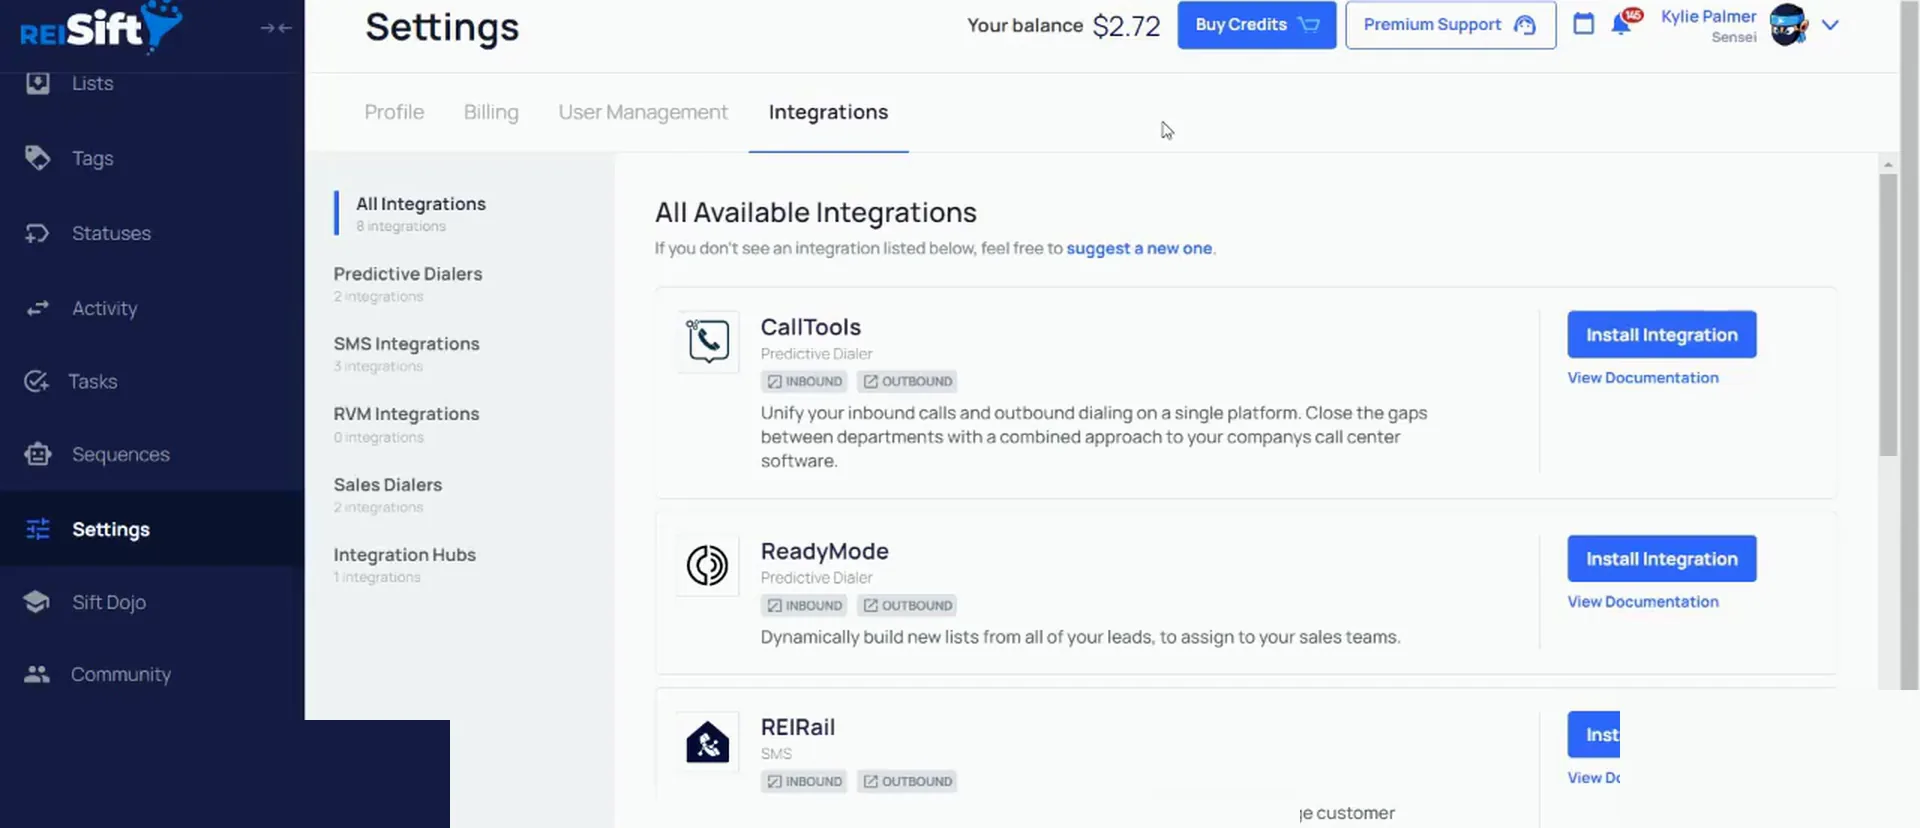
Open the Settings, Integrations section of your REI Sift account.
The page lists the integrations with their install buttons. Find SmarterContact in that list.
The outbound integration is available on our professional and business plans. This integration allows you to send records directly from REI Sift to SmarterContact.
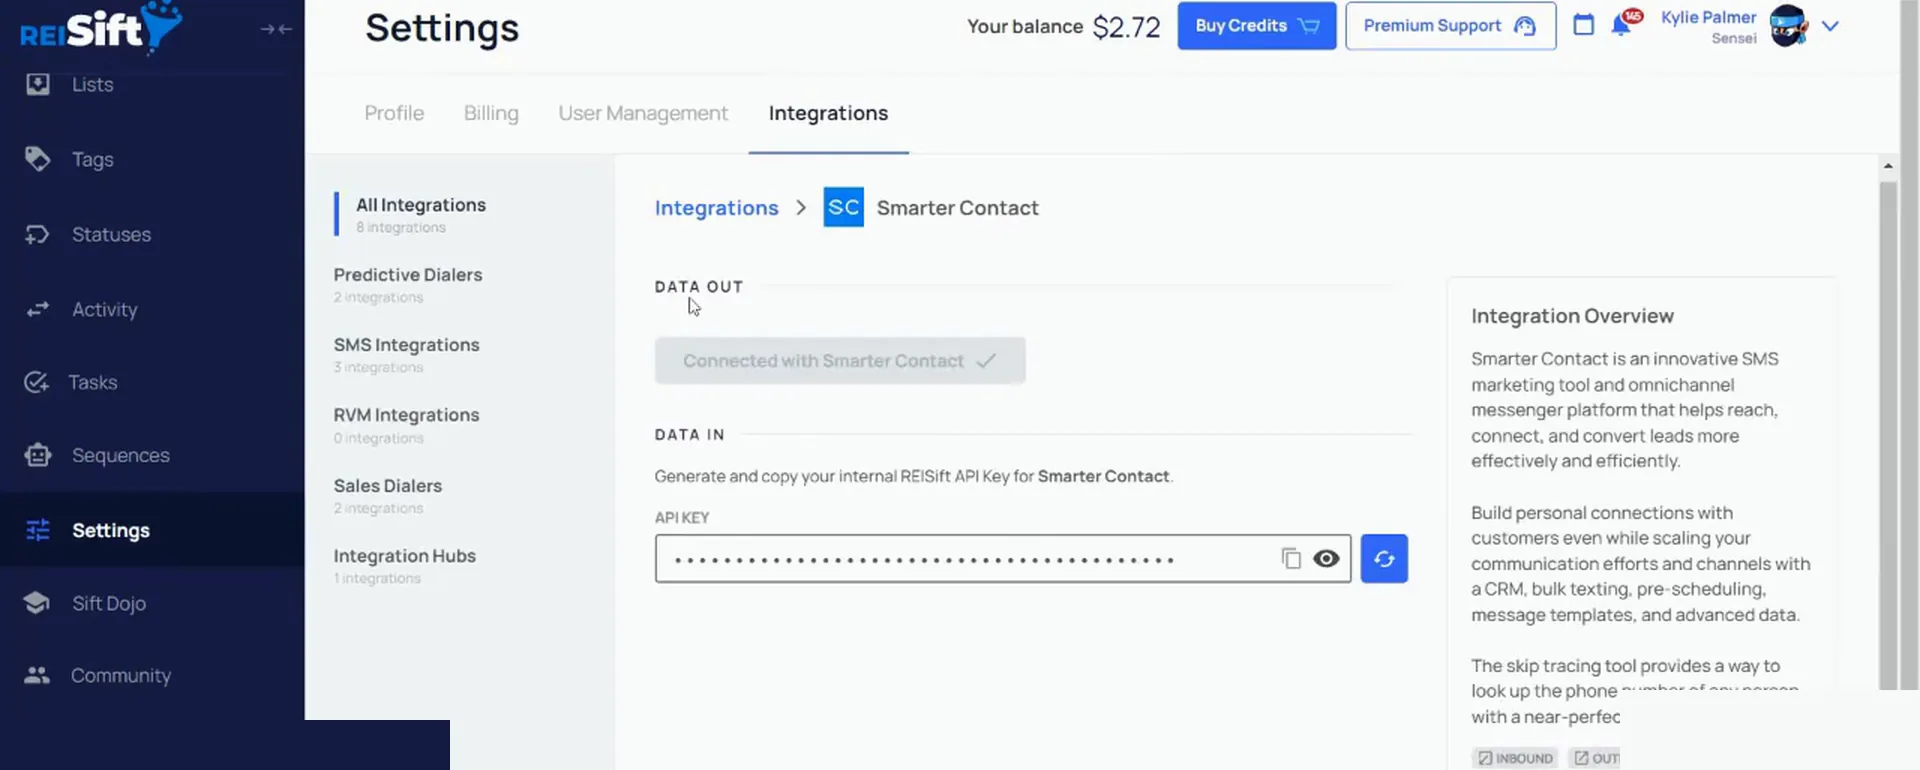
Click the Connect with SmarterContact button.
The button appears in blue if you have not connected with SmarterContact yet. Once you click it, we'll automatically connect with your SmarterContact account.
After that, the integration shows as connected, with the API key field for data coming in. Once you've connected, you're ready to start sending records.
And if you are not logged in to your SmarterContact account, you may be prompted to log in.
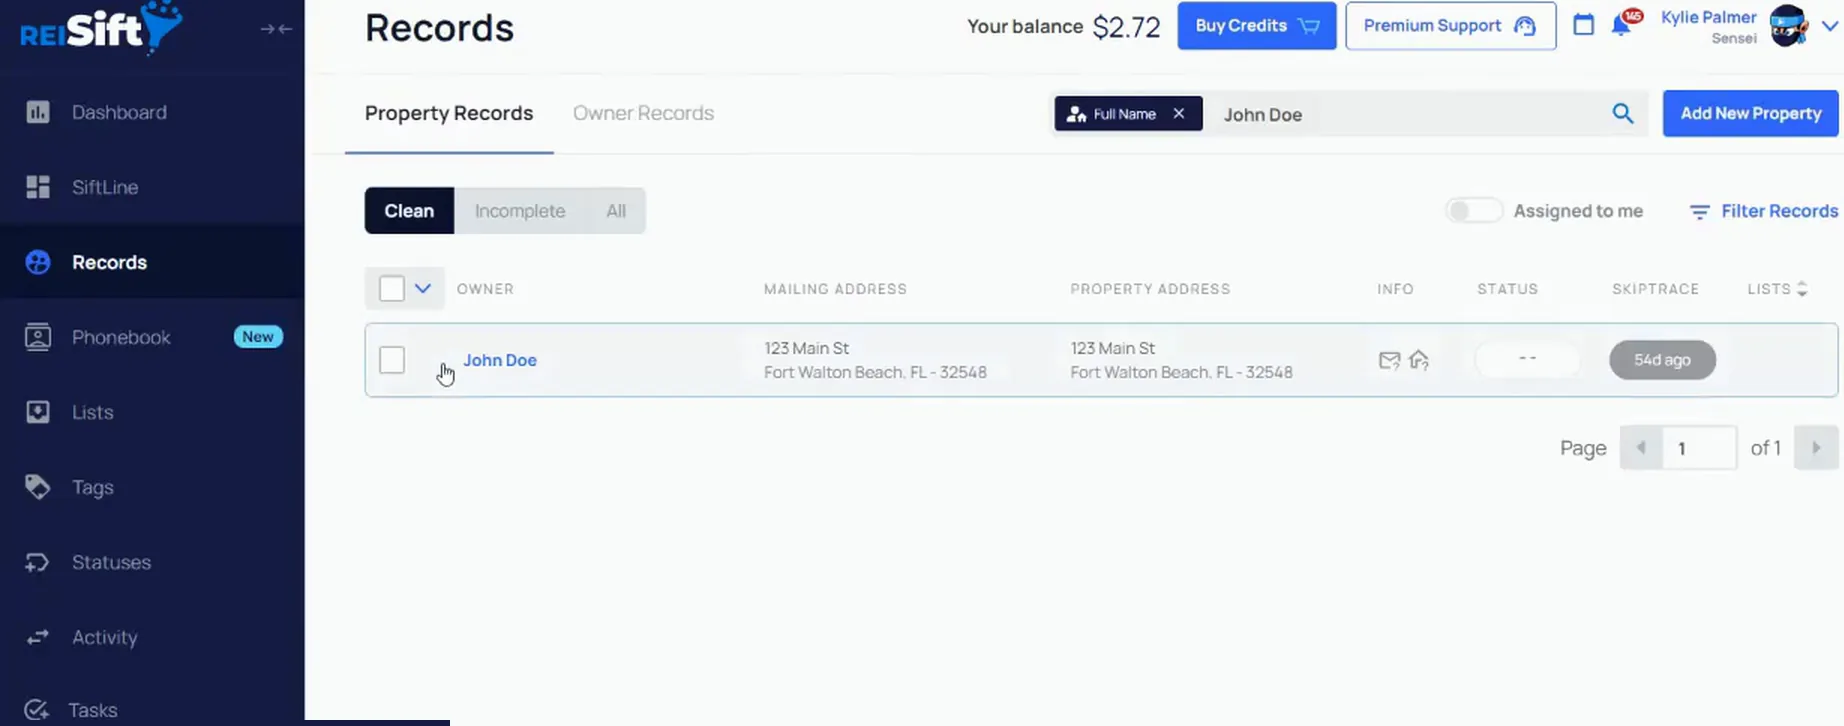
Select your filtered records, then choose Send to integrations.
From the records page, filter for the records that you want to send. The record here shows with a checkbox you can select.
Once the records are selected, pick SmarterContact as the integration you're sending to.
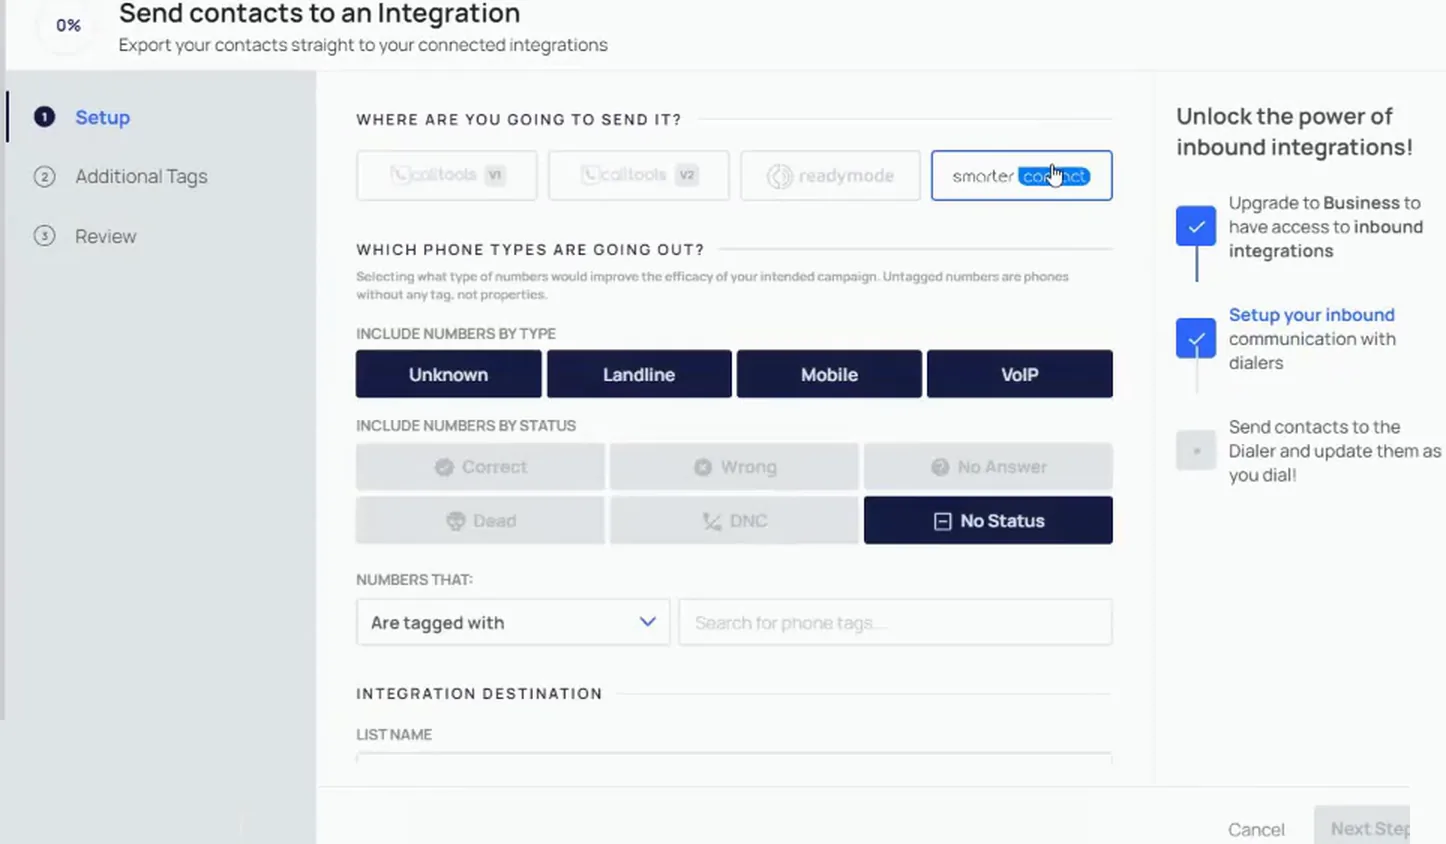
Review the phone type options on the SmarterContact send screen.
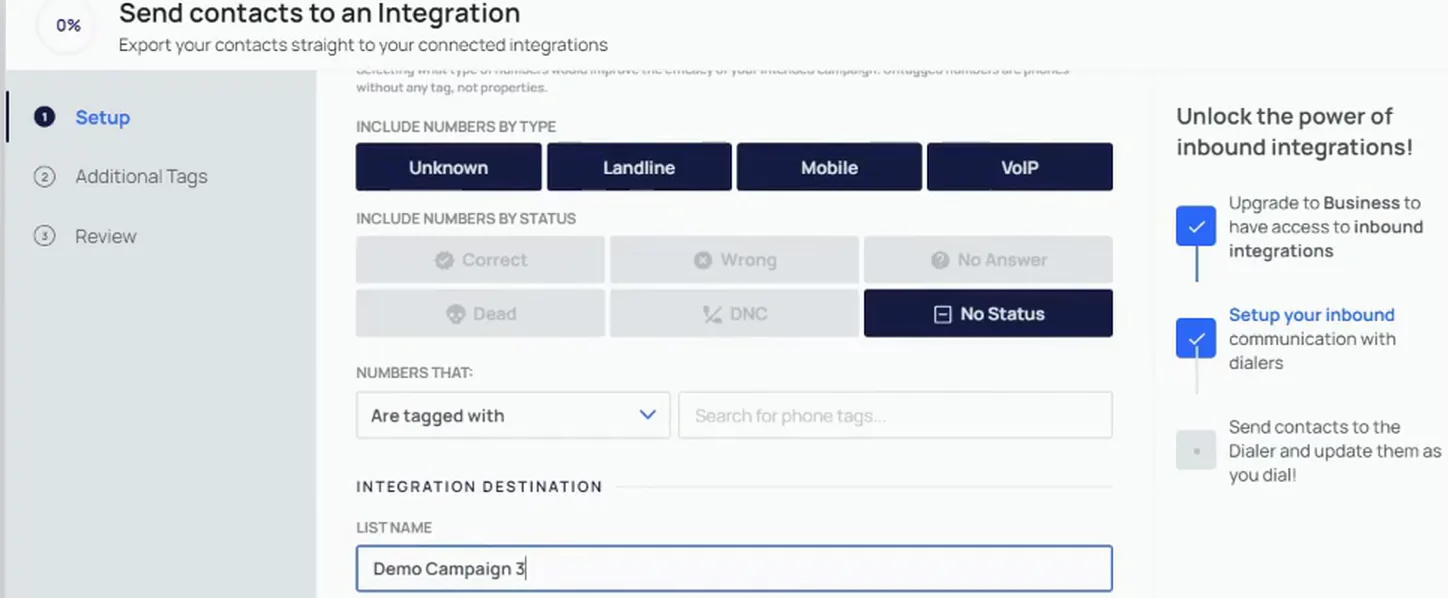
The setup screen opens with SmarterContact selected and the phone type filters showing. The options that you see here determine which phone numbers are sent through the integration.
Here you can deselect or select certain phone types.
Select Mobile under phone types and No Status under phone status.
With Mobile on its own, this would send only mobile phone types. If all options are selected, we would send any phone type.
Below that, you can include numbers by phone status. If this is a new campaign that you're sending, you'll probably only want to send phone numbers that have the no status option.
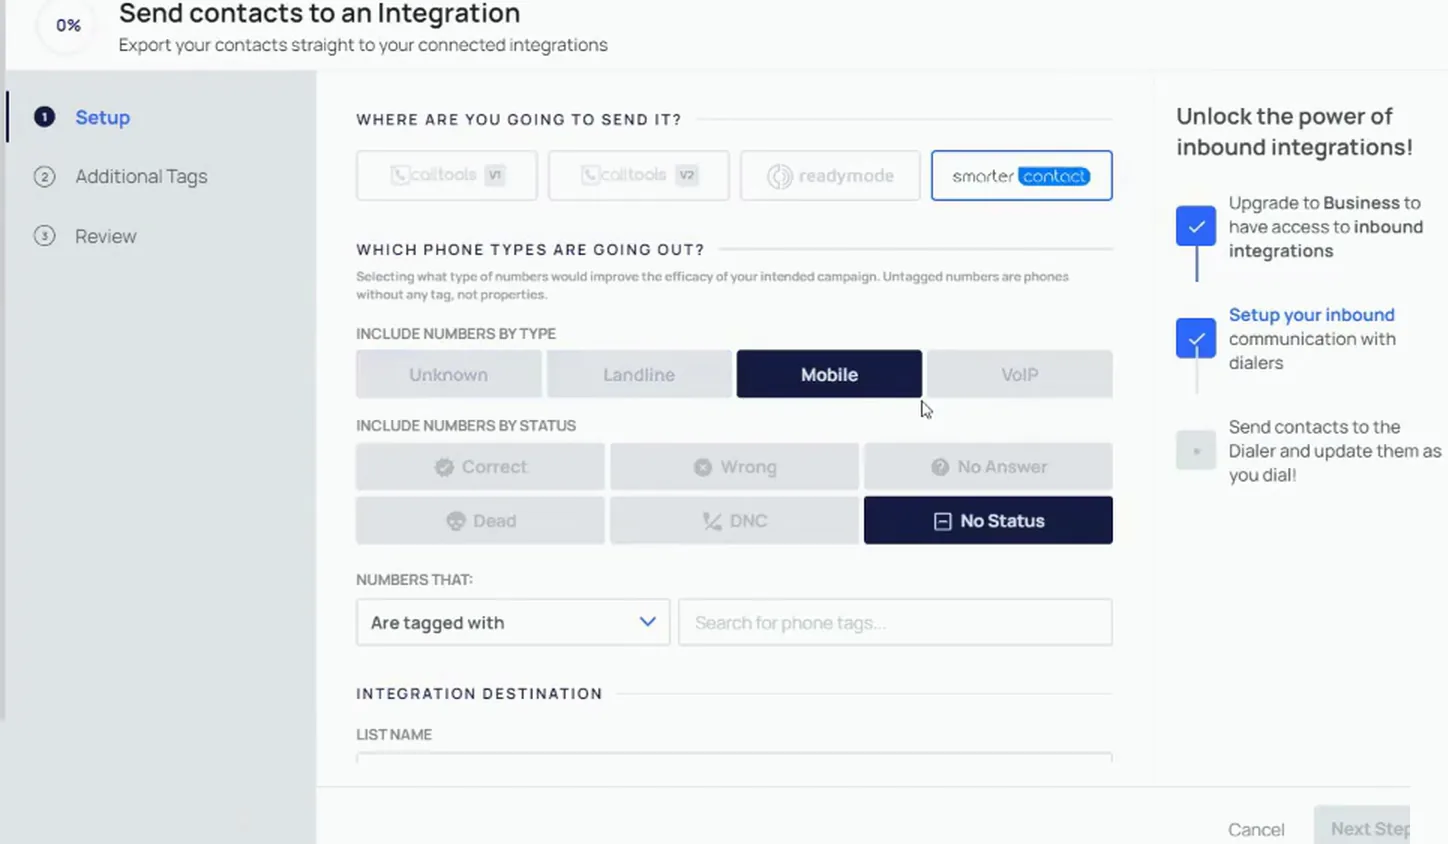
Keep No Status ticked in the phone status options.
These would be the phone numbers that you haven't reached or haven't attempted to reach yet.
If this is a follow-up campaign, you can select correct number and deselect no status.
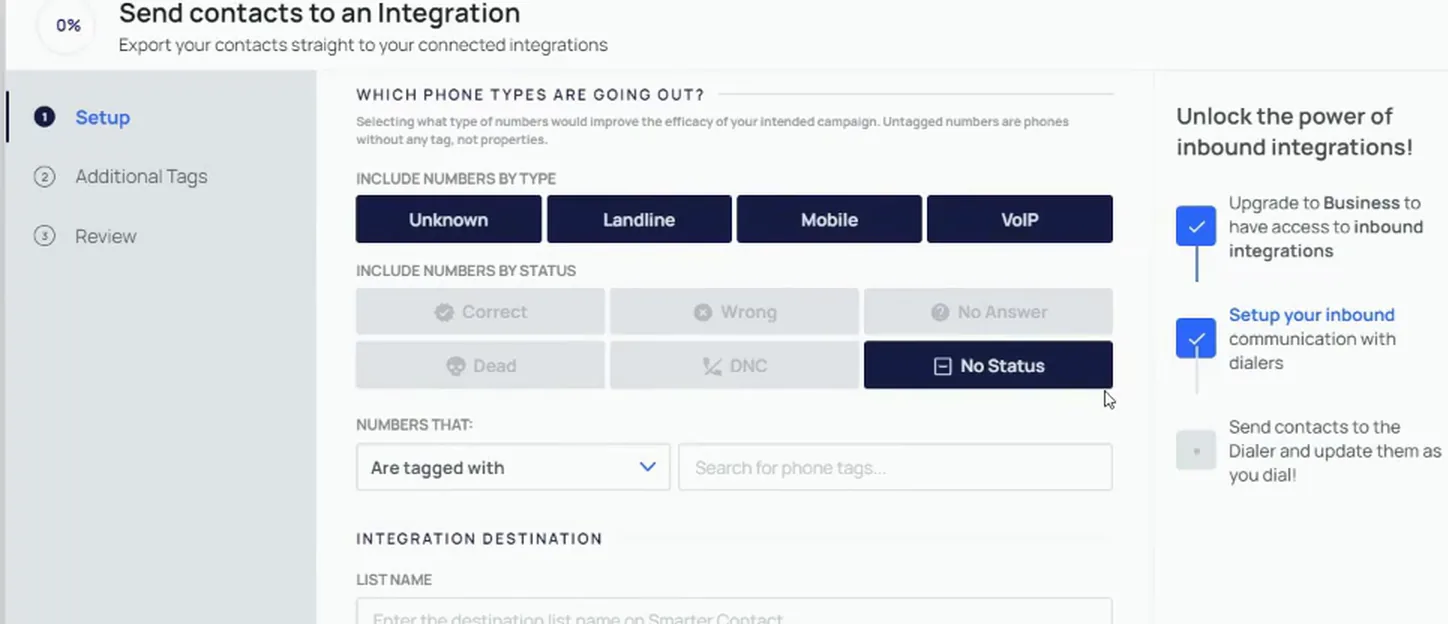
Select Correct in the phone status options.
With this option, we would only send phone numbers with the correct phone status. The phone type picks above stay as they are.
You can also choose to send phone numbers by phone tag.
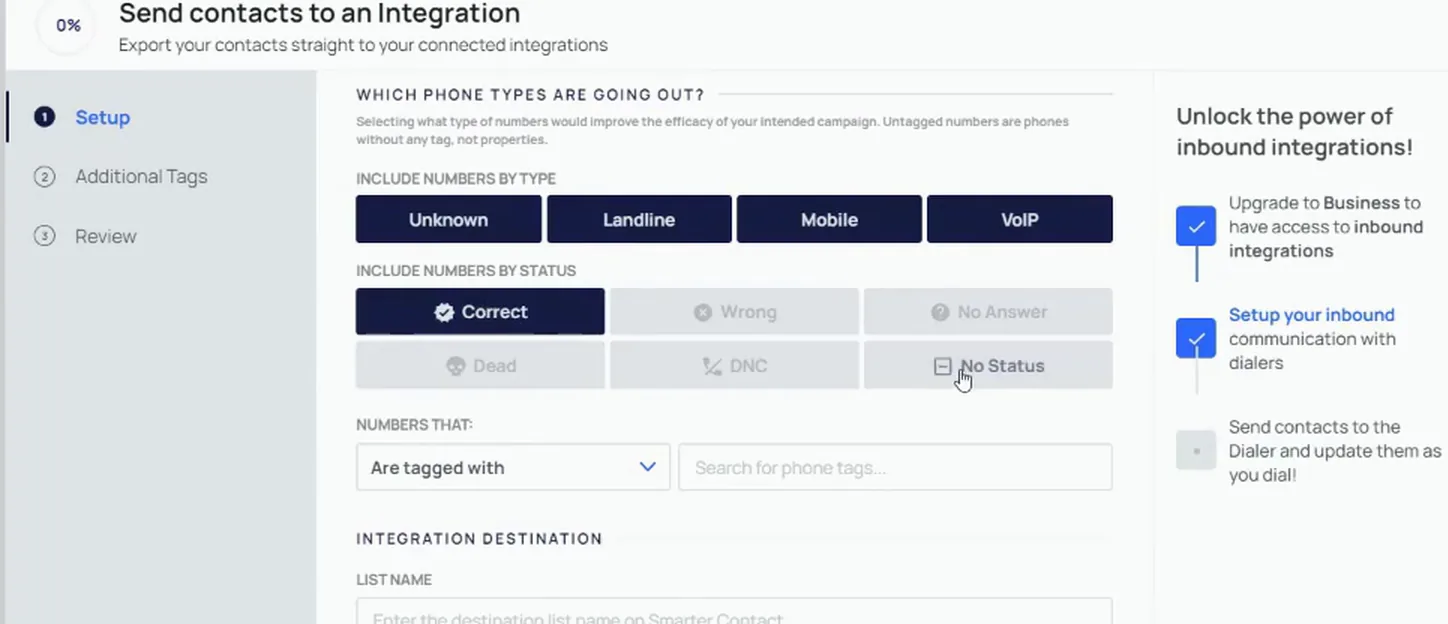
Open the phone tag dropdown on the send screen.
The dropdown sits under the phone type and status filters. From here you can select a specific phone tag to send.
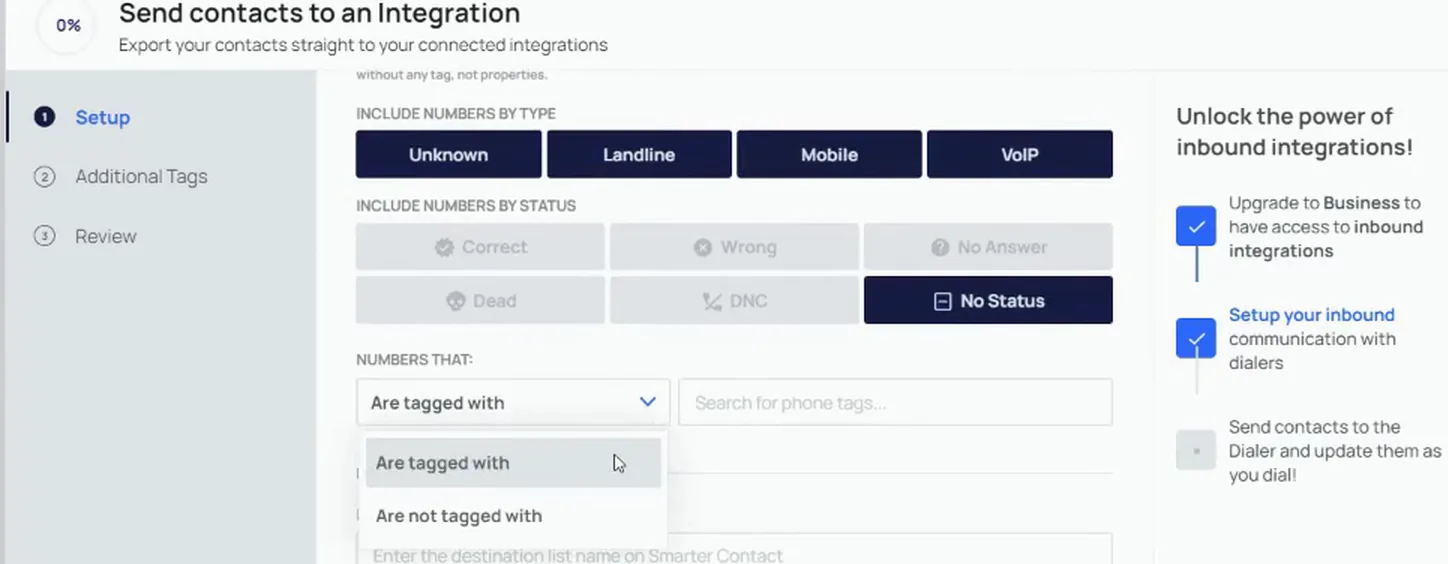
Select the PR phone tag in the dropdown.
With this option selected, we would only send phone numbers that have this PR phone tag. The phone types and status filters above are unchanged.
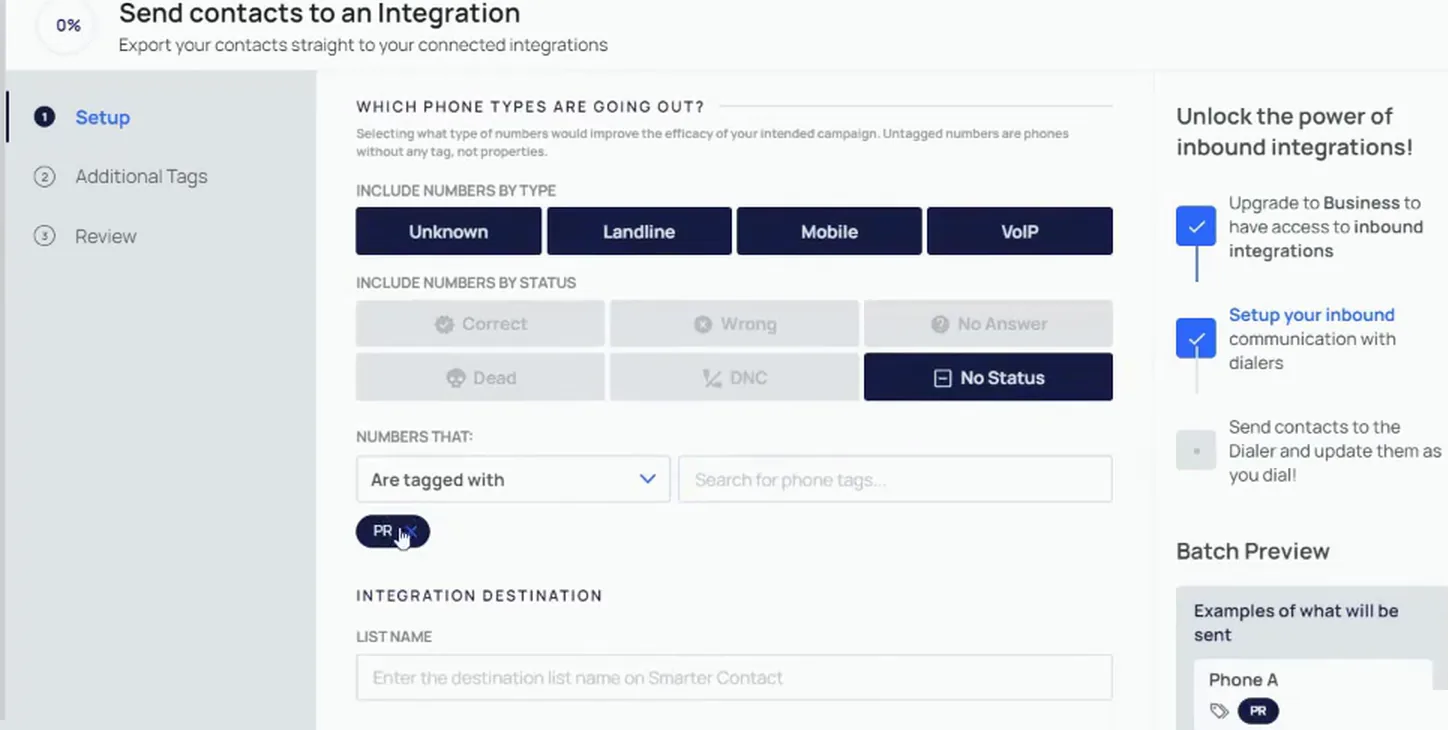
Check your phone type, status and tag picks together.
All three sets of options show on the one screen, so you can read back what will go out.
If you have any questions about the difference between phone status and phone tags, be sure to check out our additional trainings in the help center.
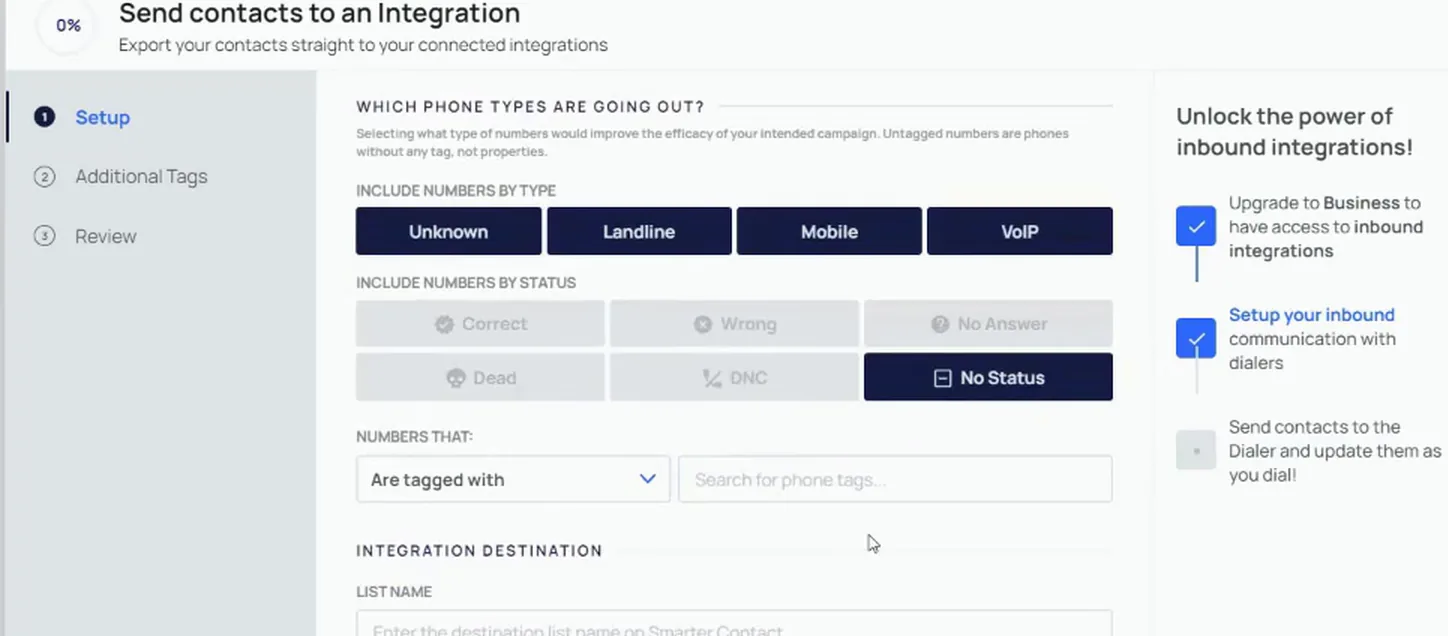
Confirm SmarterContact is selected with your phone filters set.
The trainings on phone status and phone tags will also be linked to this article as well.
With the picks confirmed, the next thing on this screen is the list name.
Once you've selected which phone numbers you would like to send, enter in the list name that you're sending to a SmarterContact.
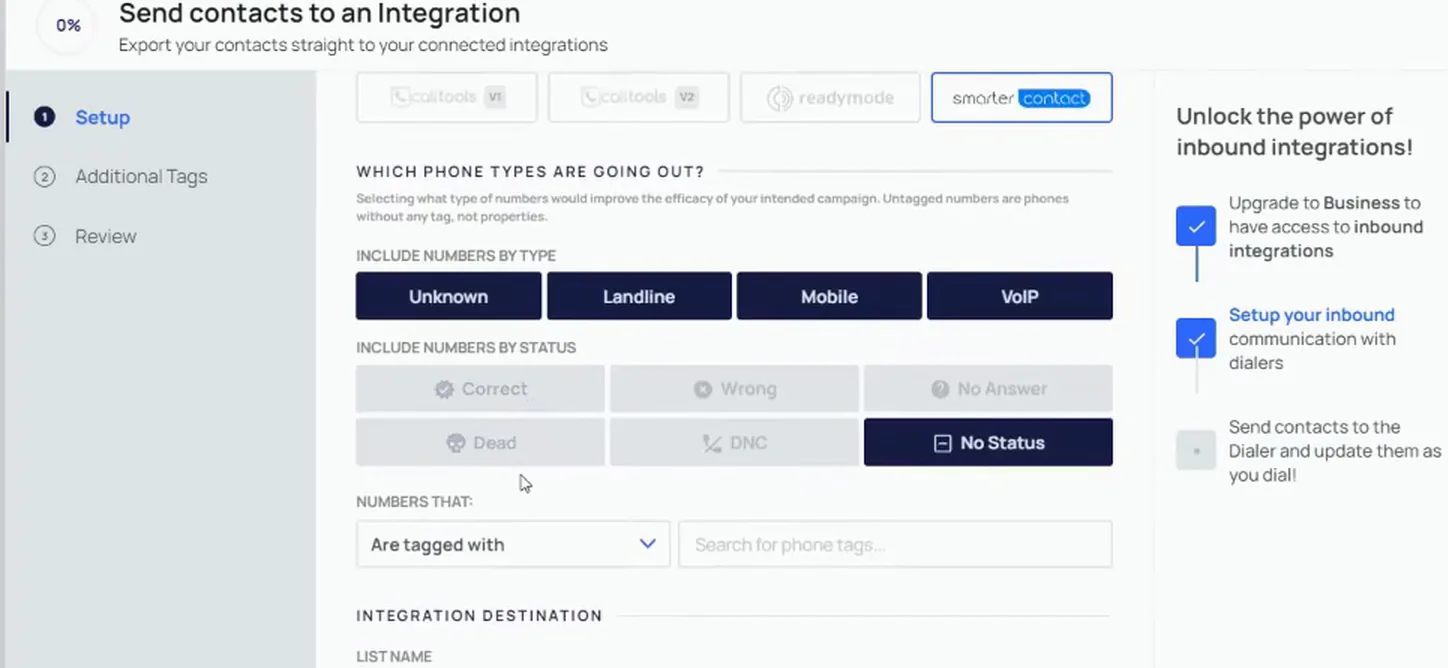
Enter the list name you're sending to SmarterContact.
The list name field sits below the phone type and status filters on the same screen. For this example, enter in this name here.
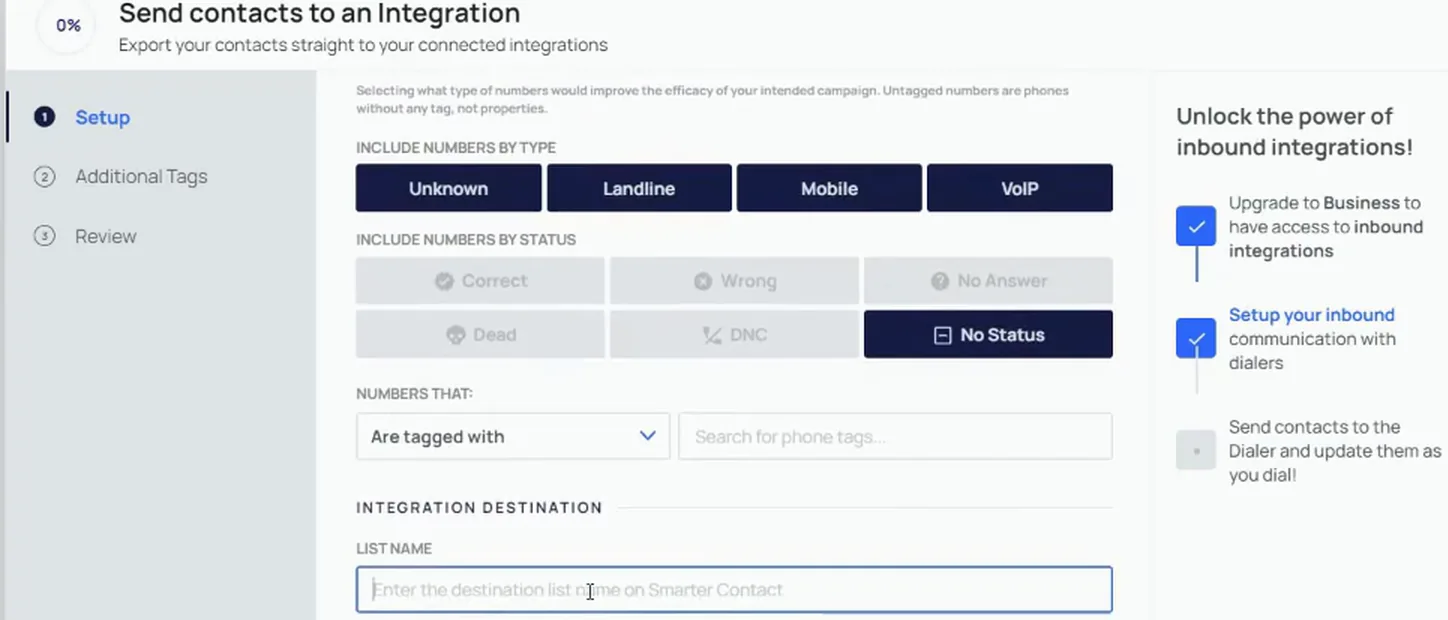
Scroll to the List Name field below the status filters.
SmarterContact is still selected and the phone type and status filters are set above. The list name field starts to show at the bottom of the screen.
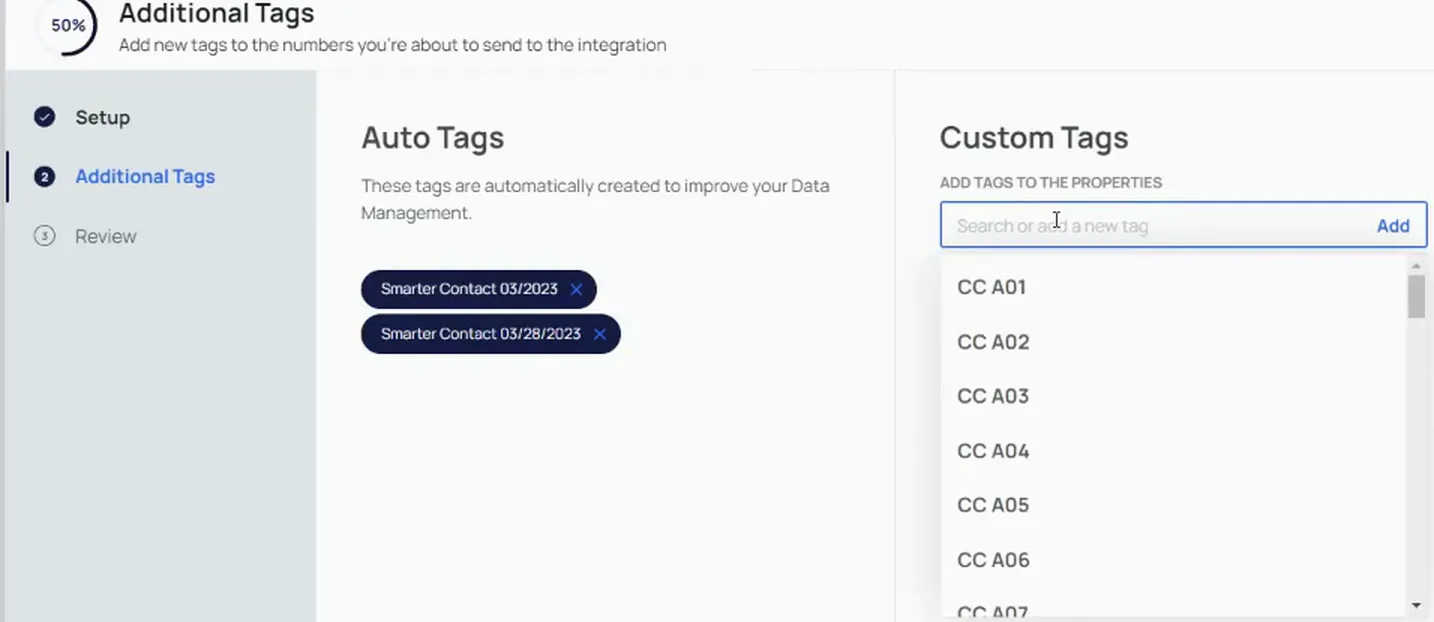
We add auto tags based on when and where you're sending the records.
Click into the empty List Name field.
The phone type filters and the status filters are still set above. The list name field is empty with the cursor placed in it, so nothing is typed yet.
Type the name that you're sending to SmarterContact here. You can also add any custom tags on this step.
Open the Custom Tags search dropdown under Auto Tags.
The dropdown shows the tag list you can search. For example, if you wanted to add a tag for the number of SMS attempts that you're sending, you pick it here.
BEFORE YOU MOVE ON