
PART 7
Export the list and update the attempts.
This is where the bulk list leaves DataSift and lands in the dialer. I walk through the export name, the download, the upload into Kixie, and then the part people forget, coming back to update the attempts. Follow the screens in order and your bulk flow chains together properly.
Export, upload, then update attempts.
Type bulk call campaign touch one in the Export Selection box.
The name field is where you say what this pull actually is. I start typing bulk call campaign, and it is touch one, not attempt one, because this is the first time we are calling through it.
The export button sits right under the field with the record count on it. Once the name is right, that is the button you press.
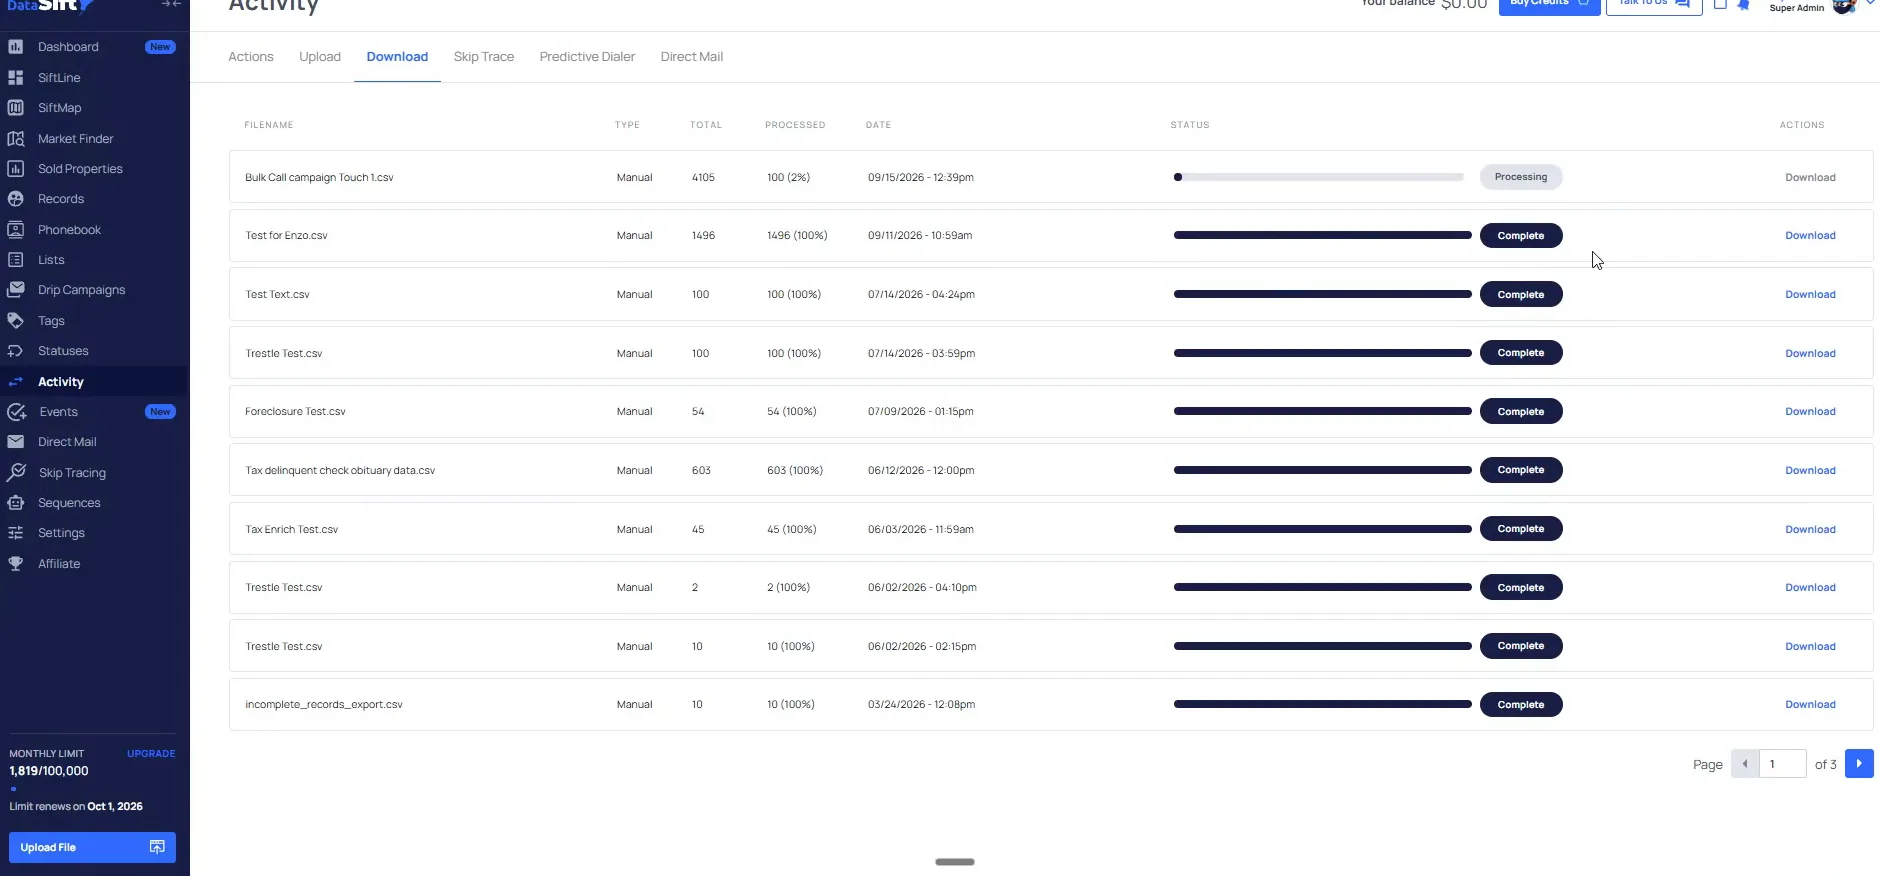
Watch the Activity Download tab until the file finishes processing.
The download shows up as the bulk call campaign touch one file and it works its way up from a low percentage. Nothing happens until it is done.
Then you take the file and upload it to something like Kixie. That is the manual route, as opposed to using the integrations.
And when this downloads page is actually done, that's when you would take this, entire list and then upload it to something like Kixie.
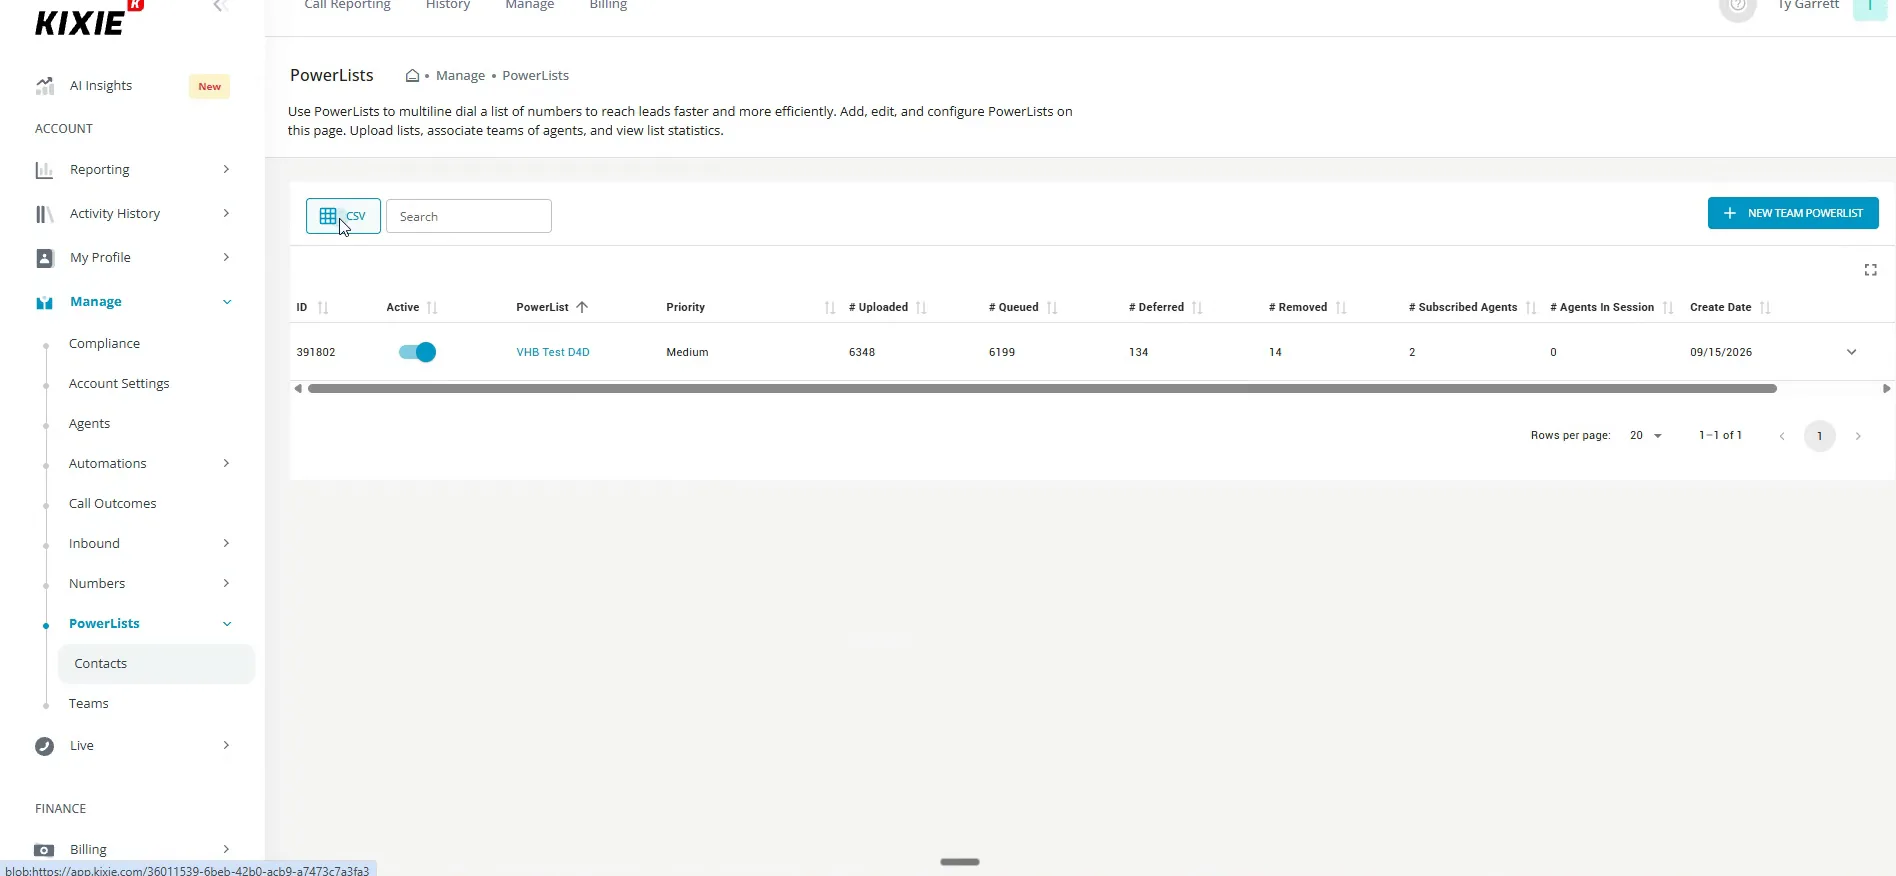
In Kixie, open Manage and then Power list.
I believe it is down inside of manage and then in power list. That is where the lists you call through live.
What you see on the page here is just a random test list that we have in the account. Yours will show whatever lists you already run.
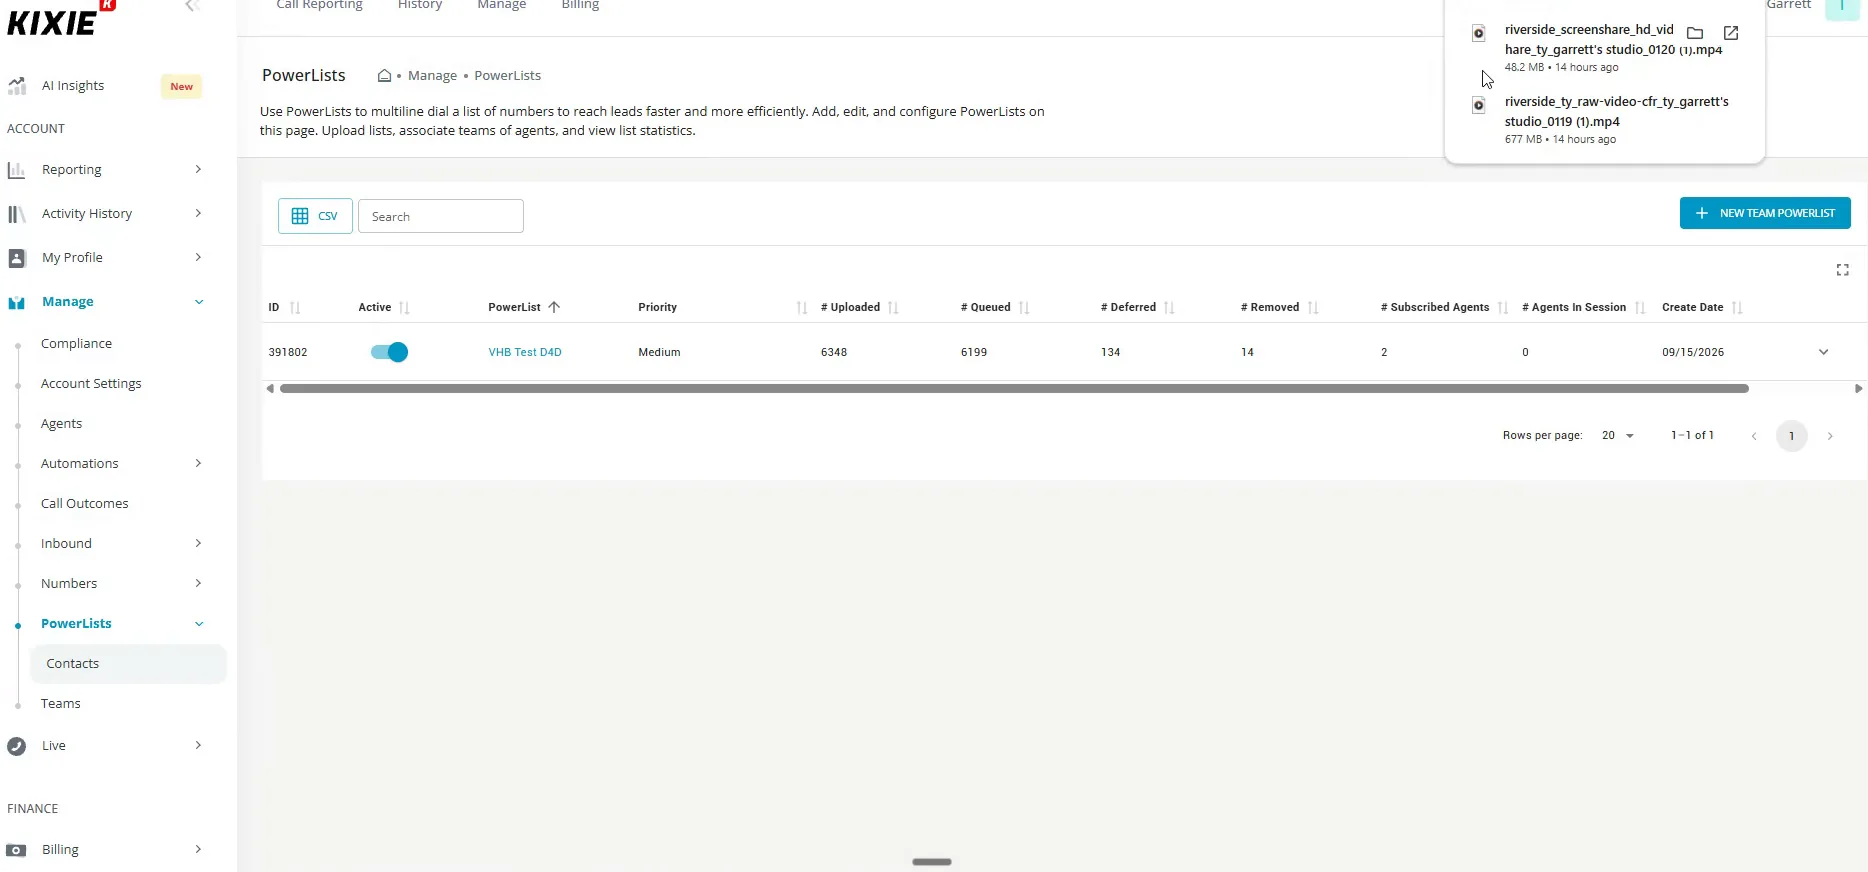
Find the New Team PowerList button on the PowerLists page.
The button sits at the top of the page next to the test list, and the cursor is not on it yet. The DataSift download popup is still sitting over the top of the screen from the export.
If we wanted to add the list in, that new power list button is the one we would use. Everything after this happens inside it.
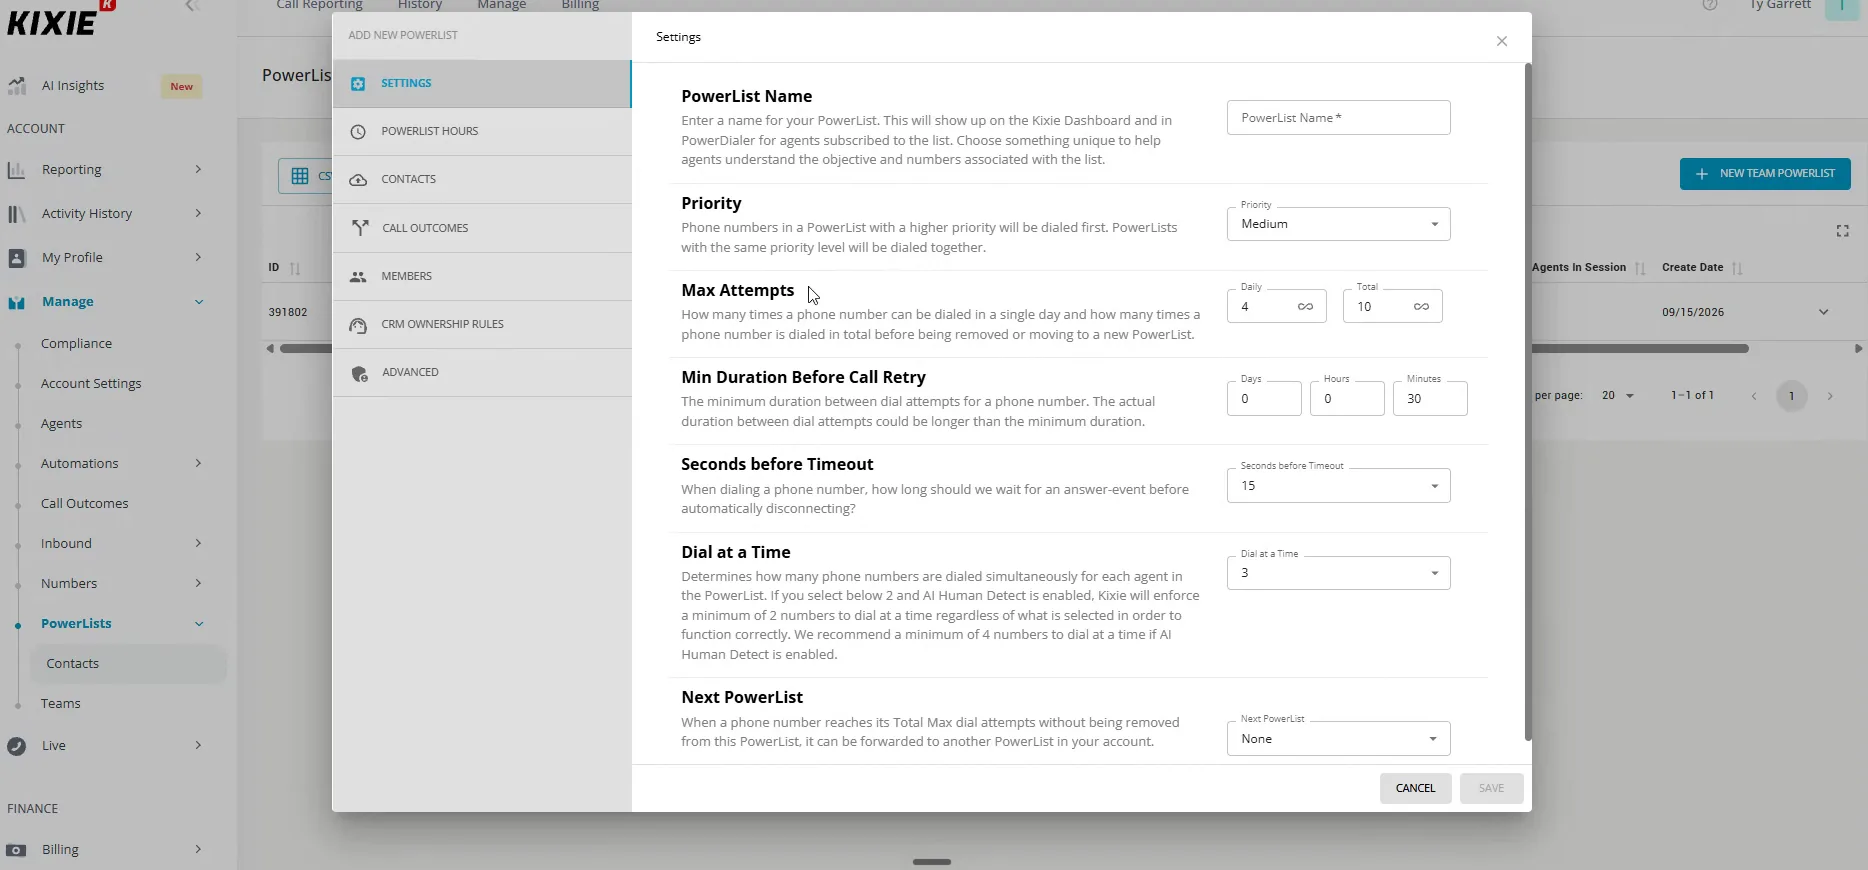
Open a new power list to see the power list settings.
This is the settings panel for the list, with max attempts, dial at a time and the rest of the fields. You set these to however your team dials.
We are not tuning them here. I am showing you the workflow so you know where each piece goes.
Come down inside of contacts and choose Select File.
The Add Contacts To PowerList dialog gives you the spreadsheet data source options and a select file button. That is how the records get in.
This is the part that replaces an integration. You are handing the file over yourself.
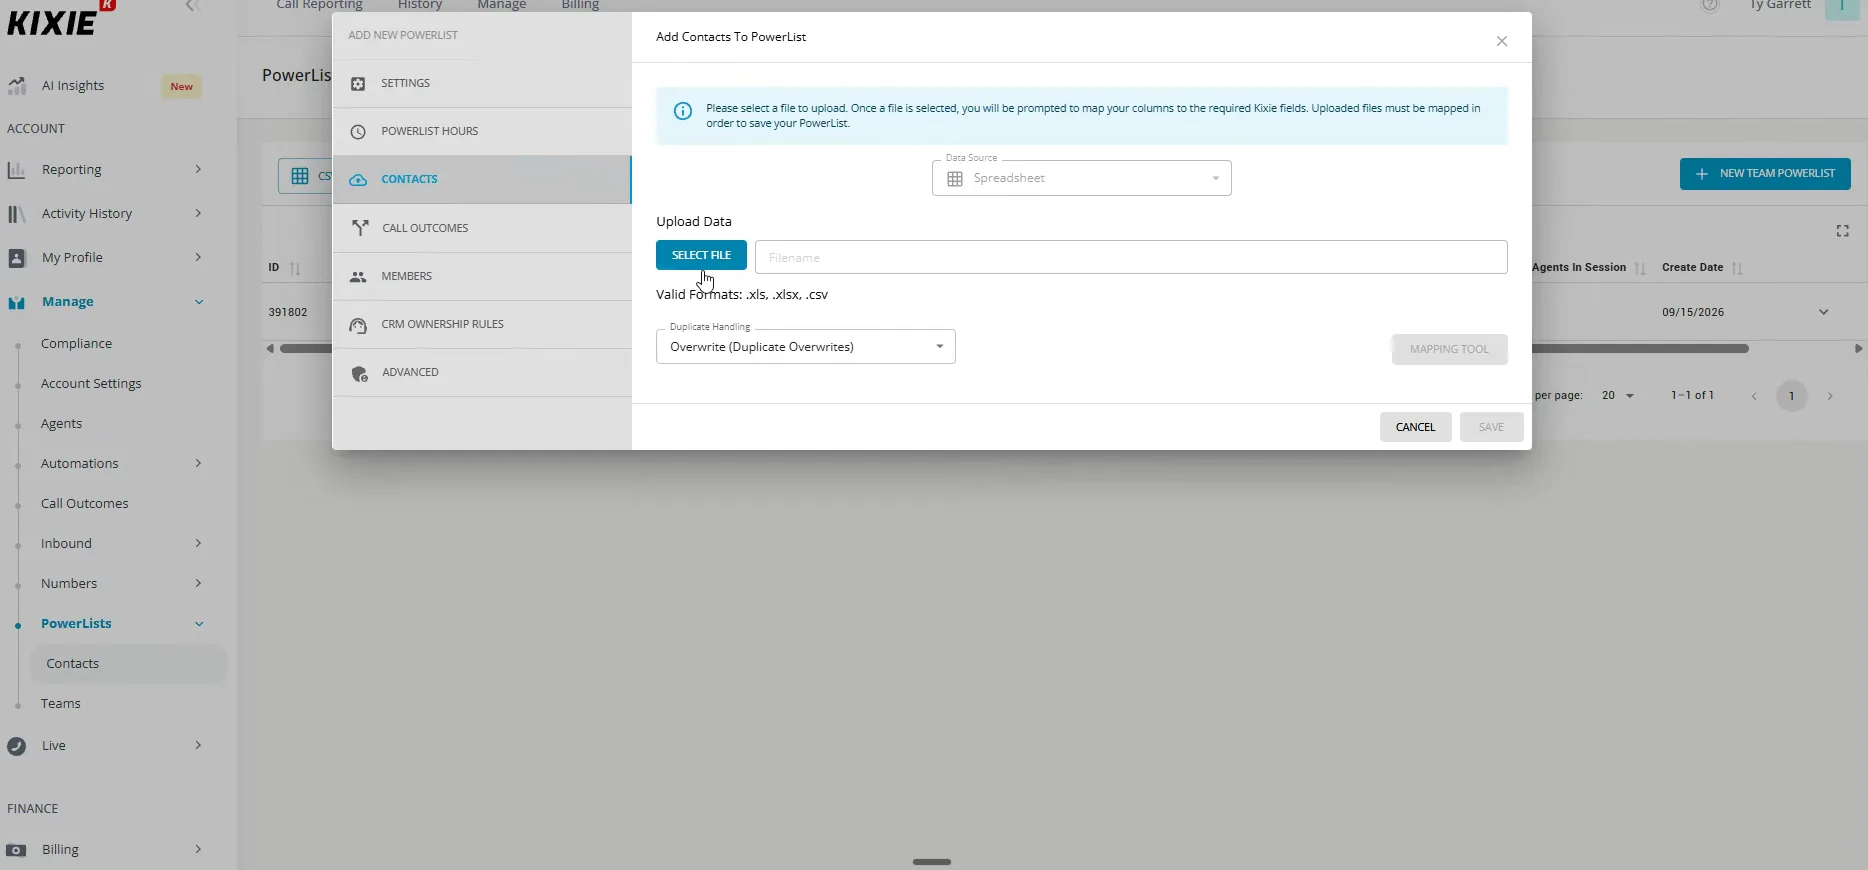
Browse to the file you downloaded, nothing picked yet.
The file browser is open with your spreadsheets listed and the file name field still empty. Nothing is selected until you click the list you want.
Let's say it was that one I just pulled in that was called Teams One. That is the file you would upload straight there.
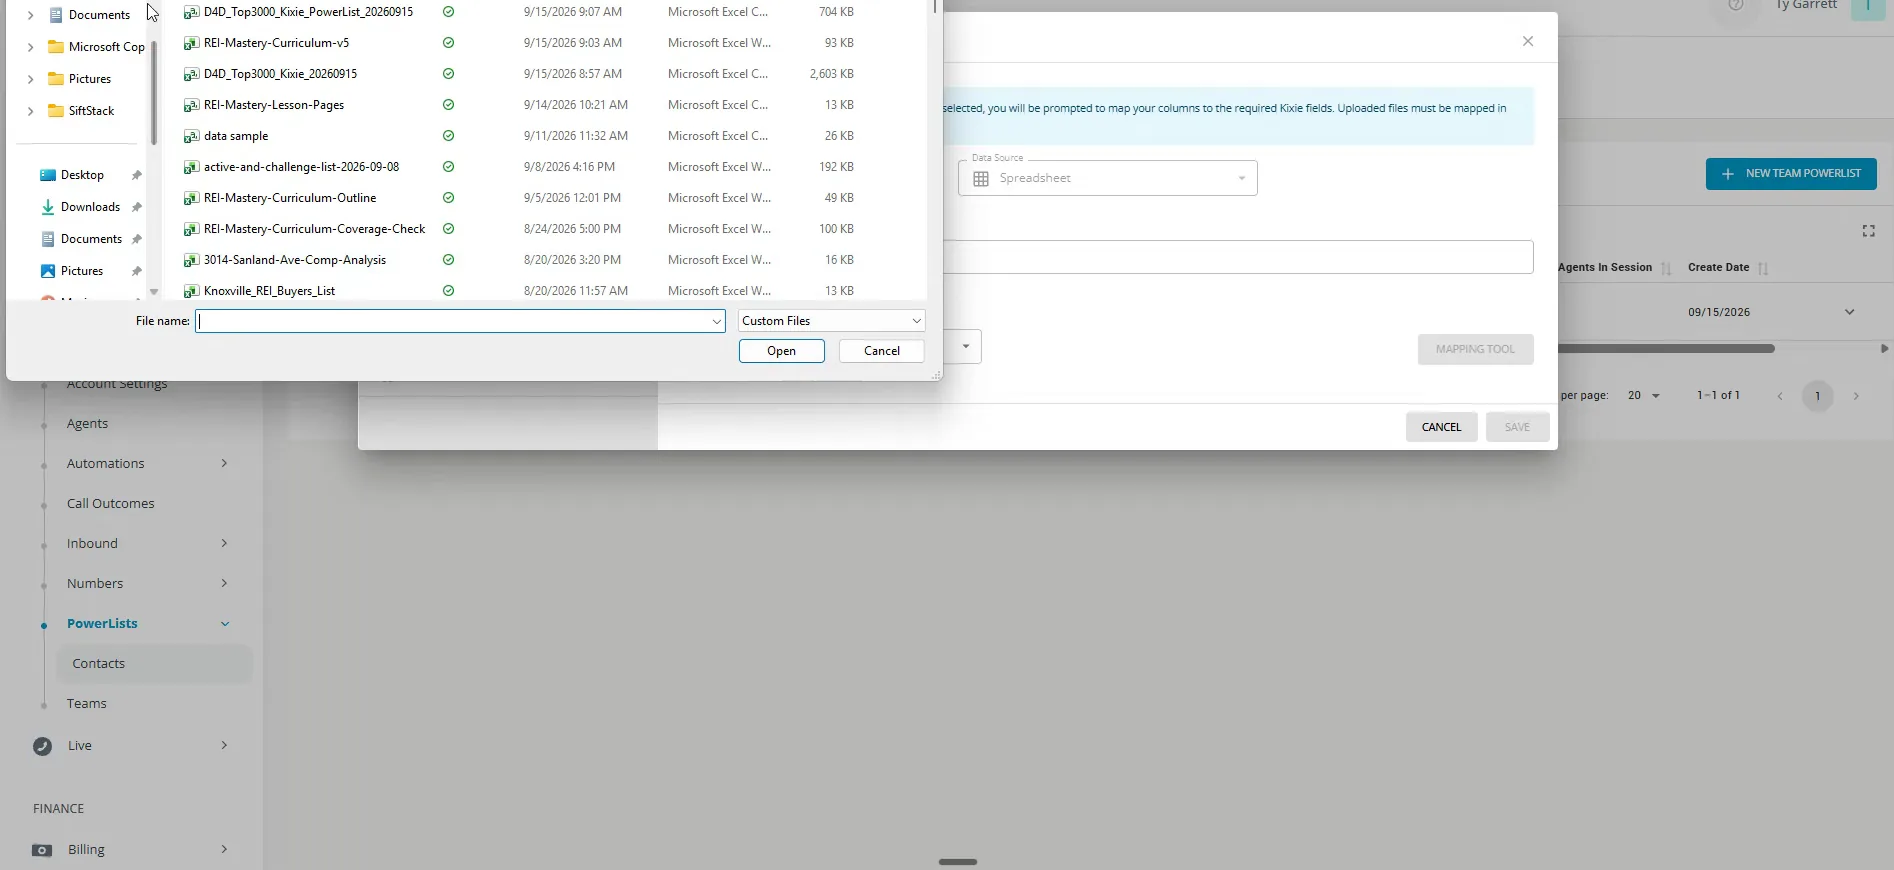
Match each of these phone numbers in the Mapping Tool.
The mapping tool lines up the headers from your file against the phone number fields in Kixie. You match each of these phone numbers accordingly.
We are not going to do all of that here. It shows you the entire step by step workflow, especially for a data manager, an admin, or yourself if you are doing the calls.
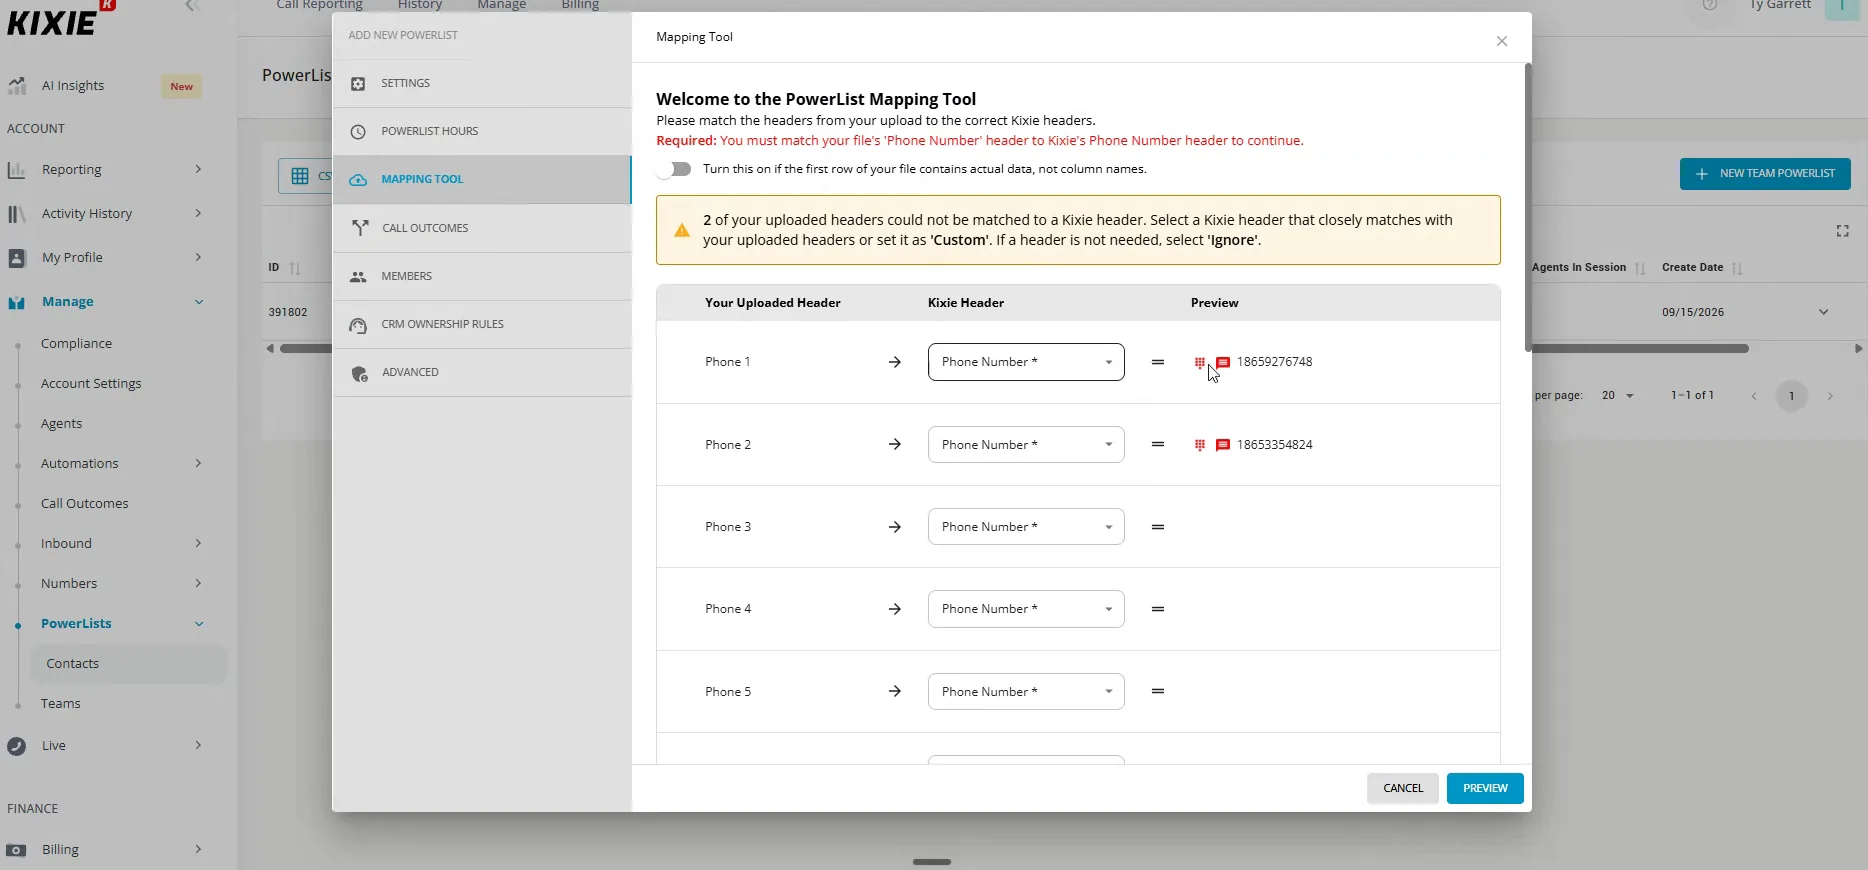
Back in DataSift, reopen the bulk ready to call preset.
Do not forget this part. We have downloaded the list and we have sent it in, so now we come back to bulk calling and back to ready to call.
The record count is still the same as what we exported, because nothing has told DataSift we called yet. That is the next click.
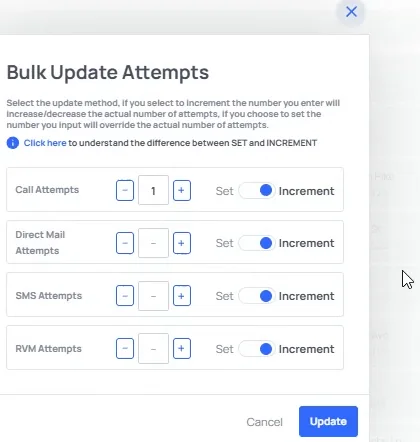
And we are just going to increase this call attempts by one because we just sent that entire list to our dialer.
In Update Attempts, set Call Attempts to increment by one.
The dialog has the call attempts value and the increment toggle on. When you hit update, it changes all of these en masse to call attempt plus one.
That is what moves the whole batch out of ready to call and into call attempt one, because we have already made one call attempt.
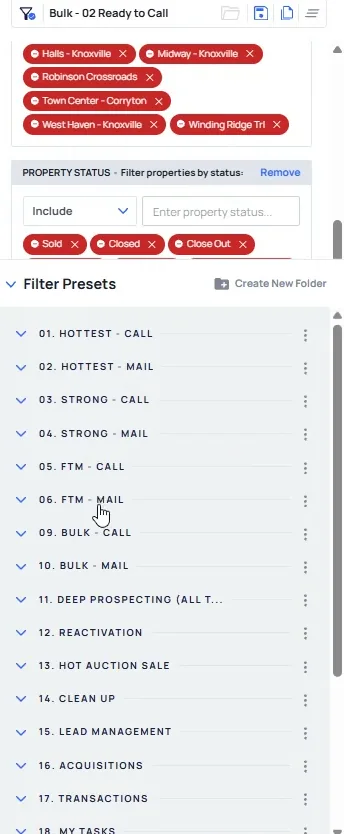
Open the Filter Records panel and check the bulk presets list.
The panel shows the preset list with the bulk call and bulk mail presets sitting under the ready to call one. Changing the attempts while exporting is what moves records through that list.
If you sent those records to an integration partner instead, you do the same thing and come back and change the attempts that way. Depending on the tool, the dispositions feed straight back in here for correct numbers, wrong numbers, no answer, do not calls and the rest.
That is how you chain together the bulk flow as opposed to the click to dial process.
BEFORE YOU MOVE ON
PART 8
Deep prospecting and the obituary filter.
Now we get to deep prospecting. There is a whole module on this, so here I am only breaking down how we set it up. We will build the obituary filter live, because that is the one I find most interesting.
Set up the obituary deep prospecting filter.
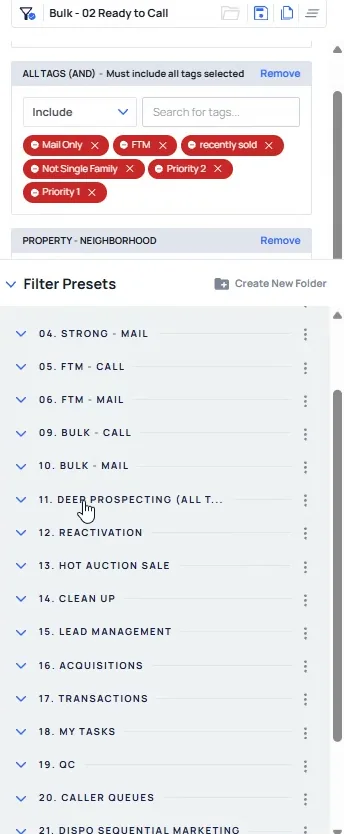
Open the Deep Prospecting folder in your filter presets.
Deep prospecting has a lot of different ways you can do it, so I gave you guys a pick your own adventure sort of thing. Typically it is no or bad phone numbers. We tried to skip trace a property, or we called through and there are no more numbers available to call.
The other path is a return mailer. We called them, we sent the mail, and the mail came back. Something is probably going on, so we need to dive deeper on that record.
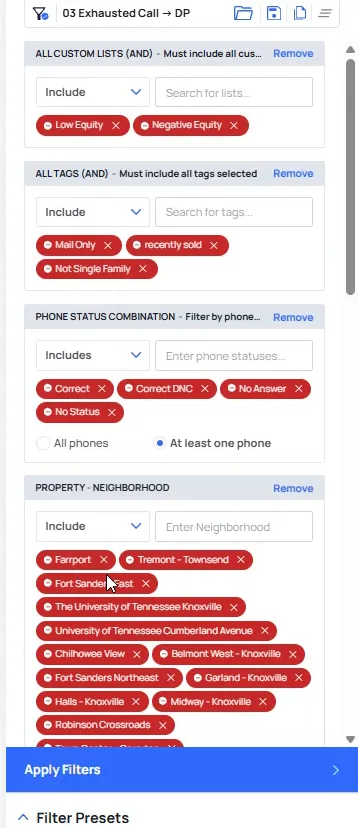
Open the Exhausted Call to DP preset.
This one is the exhausted record. We called them and they still have not answered, so maybe we are calling the wrong person, or maybe the skip tracing is wrong.
The panel shows the phone status filters and the neighborhood filters that move that record into deep prospecting. The other way to do it is straight up obituary, and that is probably the most common structure here.
Or it could just be straight up an exhaustive record, meaning, we've called them, eight times and they still haven't answered.
Set the Obituary custom list to included in the preset.
If it is an obituary record, we want to treat it differently. Traditional skip tracing is not going to work on them, because the owner is deceased.
The list now sits in the panel alongside the neighborhood and status tags. That is what makes this a solely obituary record set.
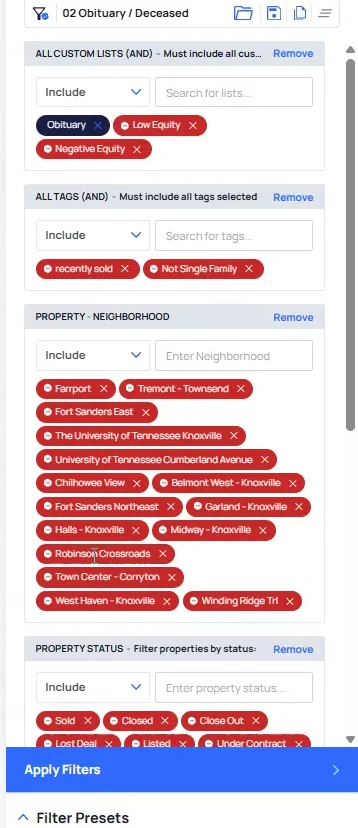
Open the Deep Prospecting preset list with the obituary stages.
The obituary flow is the same exact thing as the rest. It goes obituary ready to call, then the obituary call attempt stages after it.
That is a click value process exclusively. If you do not do it that way, it is going to be much harder to reach them.
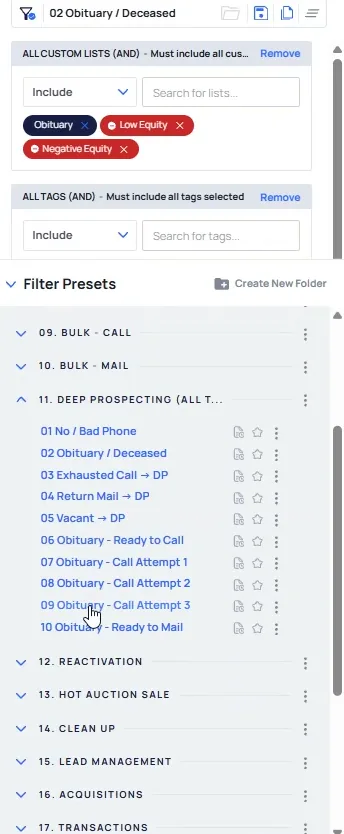
Look at the neighborhood exclusions and the blank Owner Properties Owned fields.
Everything here is still the same. I am suppressing low equity, I am suppressing negative equity, and I am suppressing those neighborhoods I do not want to be in. The Min and Max under Owner Properties Owned are sitting empty on this screen, and it is only showing owners that own one particular property.
The big change is that instead of excluding just these two lists, it must include the obituary filings. Some of the records that come back already have a deep prospecting status attached to them.
And when I click on this, this is gonna show you all the properties that have an obituary filing actually attached to them.
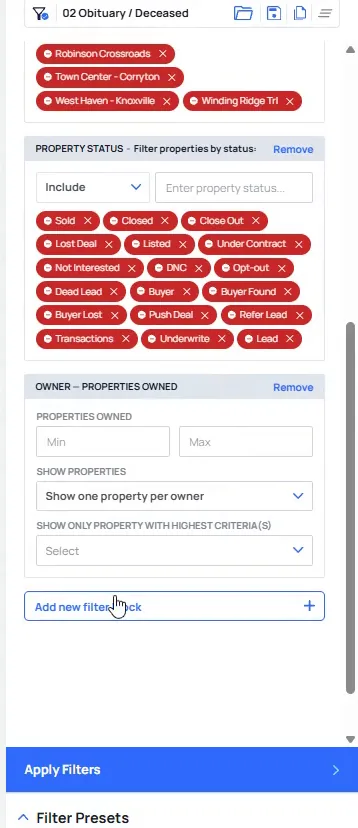
Click Add new filter block under Owner Properties Owned.
I found this through the doors per deal work and the research we have done. An obituary filing with some age on it is usually that sweet spot. That is where you are willing to send somebody out.
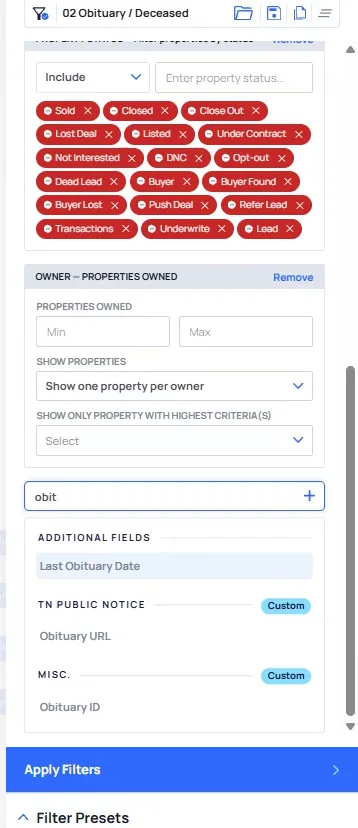
The panel now has room for one more field under the property status and properties owned blocks. The field we want is the last obituary date.
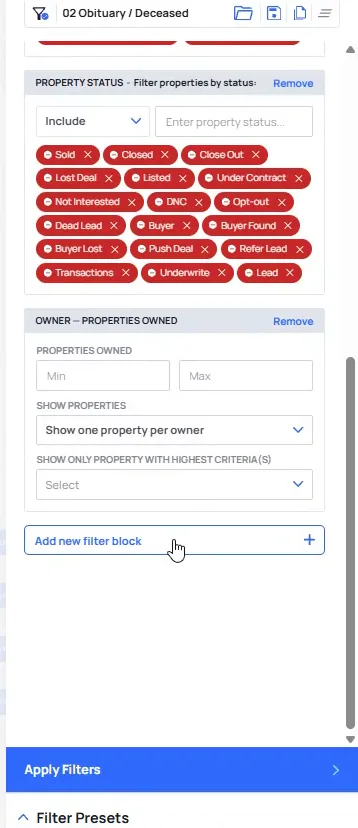
Pick Last Obituary Date as the new filter field.
This is the filter I wanted to show you live, because I think it is super interesting. We want to pick a date that works on a quarterly basis.
With the field chosen, the panel gives you the comparison options next.
So we're gonna do prior to the date, and we want to do this in months, and we want to do this prior to the last quarter.
Set Prior to Date in months, then open the calendar.
The calendar opens on the panel so you can set the cutoff. We want prior to the last quarter, counted in months.
It can run from today's date. That keeps the pull on a quarterly rhythm every time you come back to it.
BEFORE YOU MOVE ON
PART 9
Put three months in the filter.
This is the last piece of the obituary filter, and it is the one people get wrong. We want everyone whose obituary date sits prior to the last quarter, going back two years. Here is every control, in the order I click it.
Set the obituary date prior to quarter.
Open the Obituary section in Filter Records.
This is the piece that ties up the whole thing. The panel is showing you everyone prior to the last three months, and you can read the range on screen.
That range is the quarter view of the same idea we built by hand earlier. Read it before you touch anything.
So if you wanted to set up this exact filter from the time on the quarter perspective, this is how it would look.
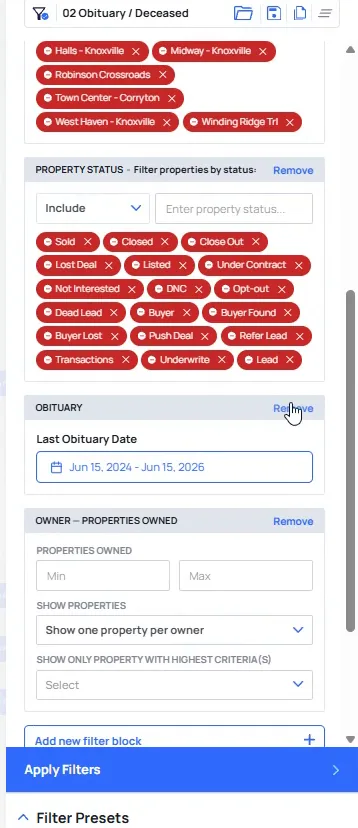
Select Prior to date, then set the period to Quarter.
We want it prior to the date of the last quarter, so prior to date is the option. The quarter is very simple because it is last ninety days.
Not perfect, but it is the best way to do it.
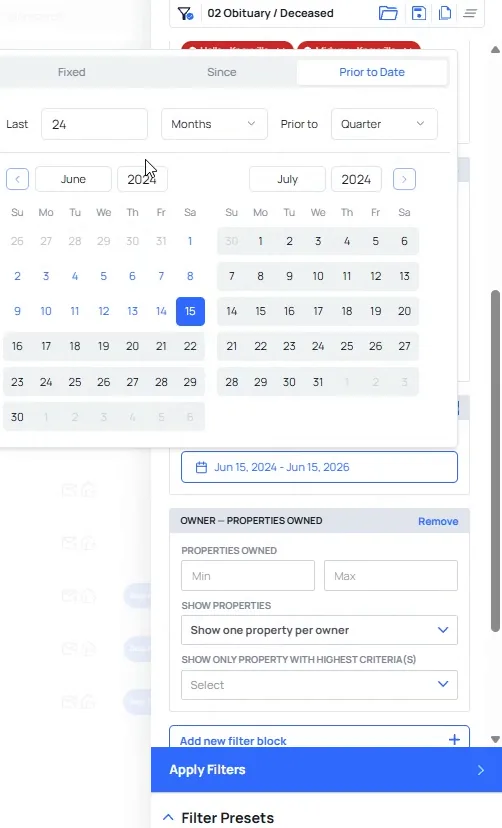
Go into months and choose last twenty four months.
I like to select last two years, three years, whatever fits what you are working. Here it is the last twenty four months prior to the last quarter.
Then select the date there. It is a bit clunky on that portion, so go slow with the calendar.
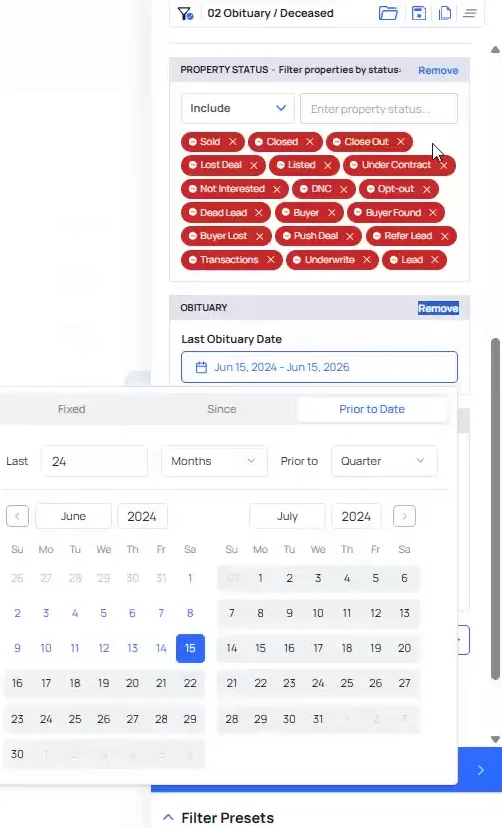
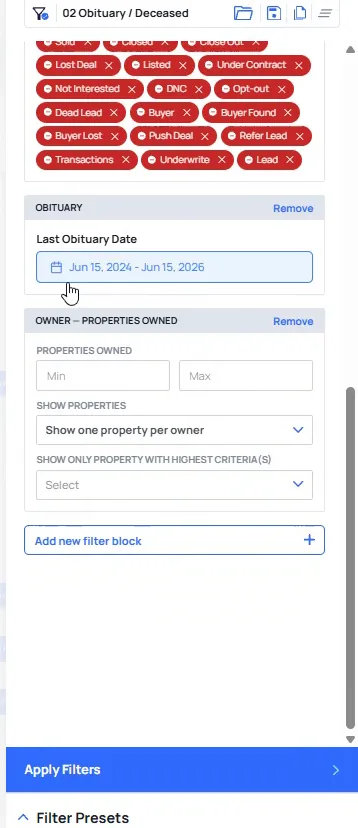
Click Apply Filters with the obituary date range set.
You can see the range has moved because it is going back three months prior. That is the quarter doing its job on top of the two years.
Once it runs, every record in the list sits inside that window.
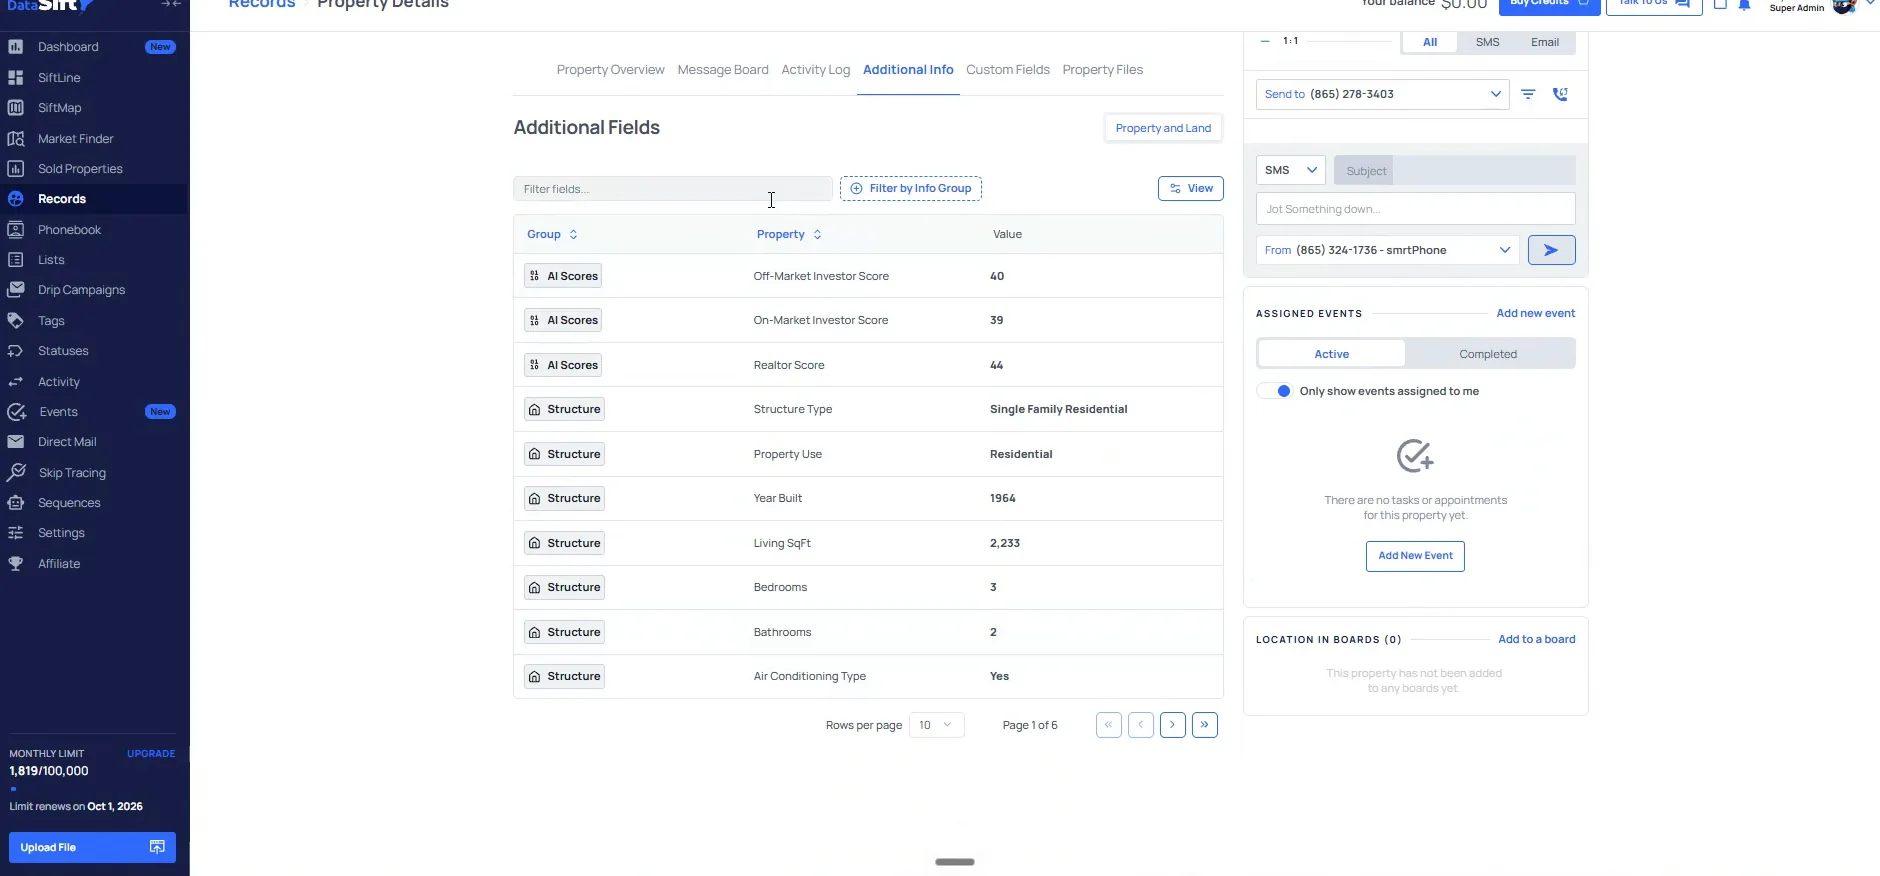
Open the first record and click Additional info.
I want to check the filter actually did what I asked. The additional fields open up here, and the obituary date is the one I am reading.
This is the habit. Apply the filter, then open one record and prove it.
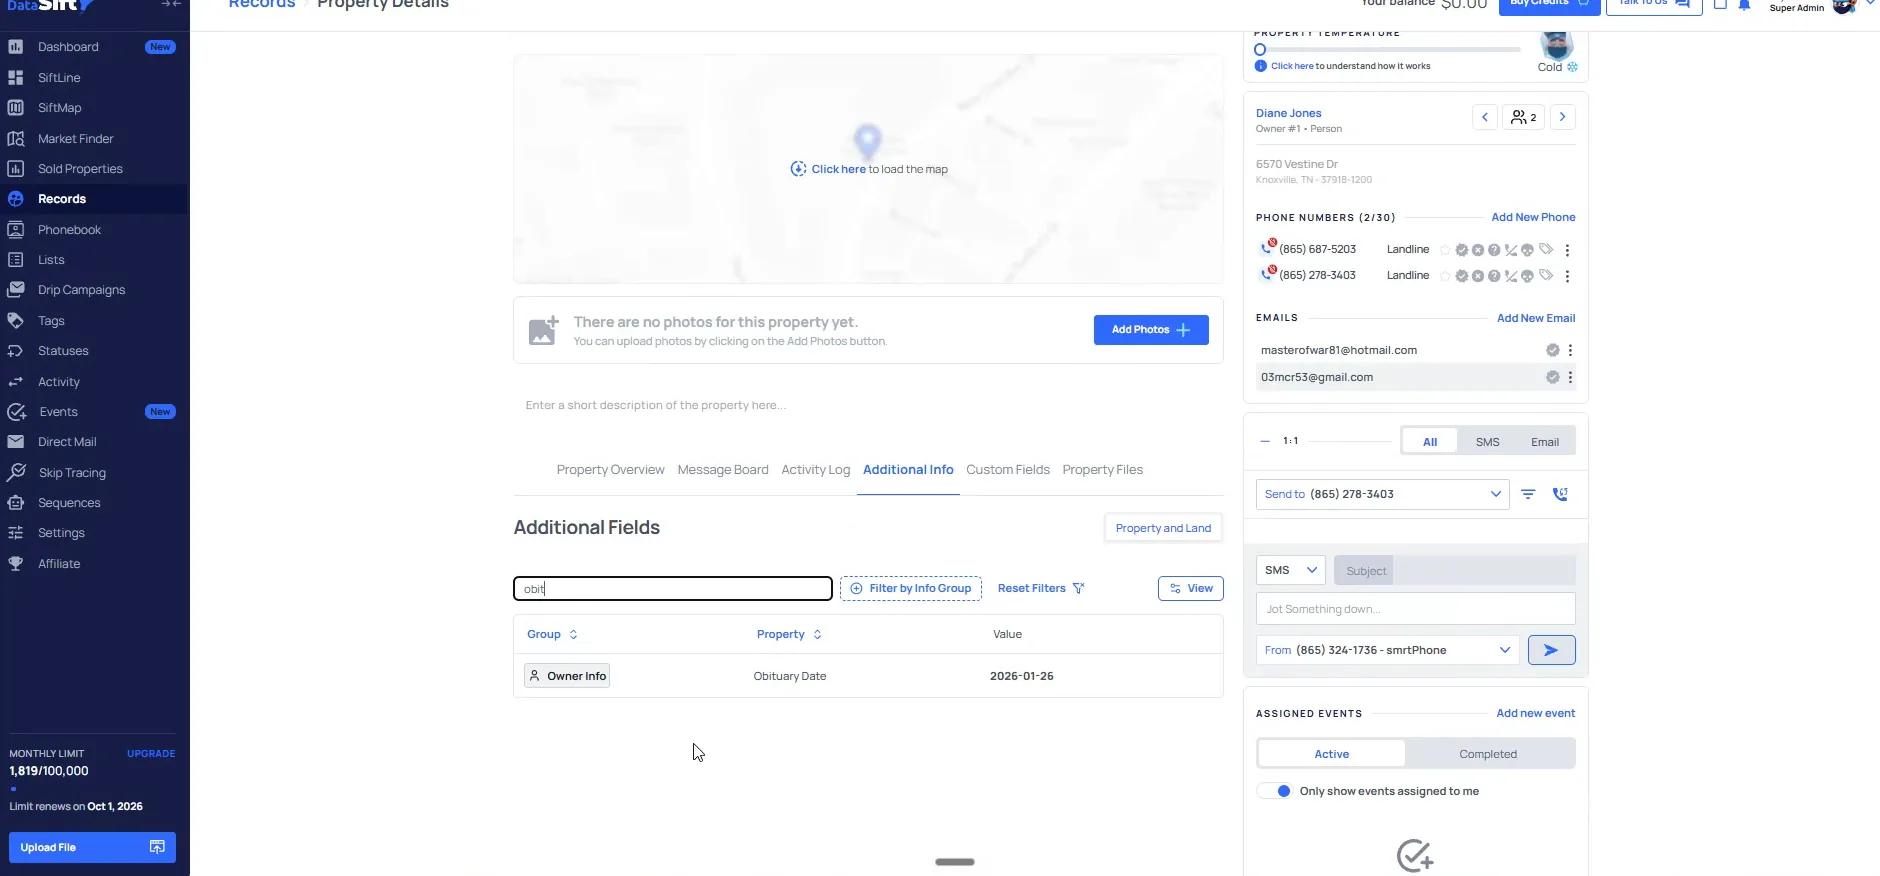
Read the Obituary Date field under Owner Info.
The date on this record sits inside the window we just set. That is the whole point of the check.
This person passed away on 01/26/2026, meaning, enough time has passed where we can reasonably reach out to them.
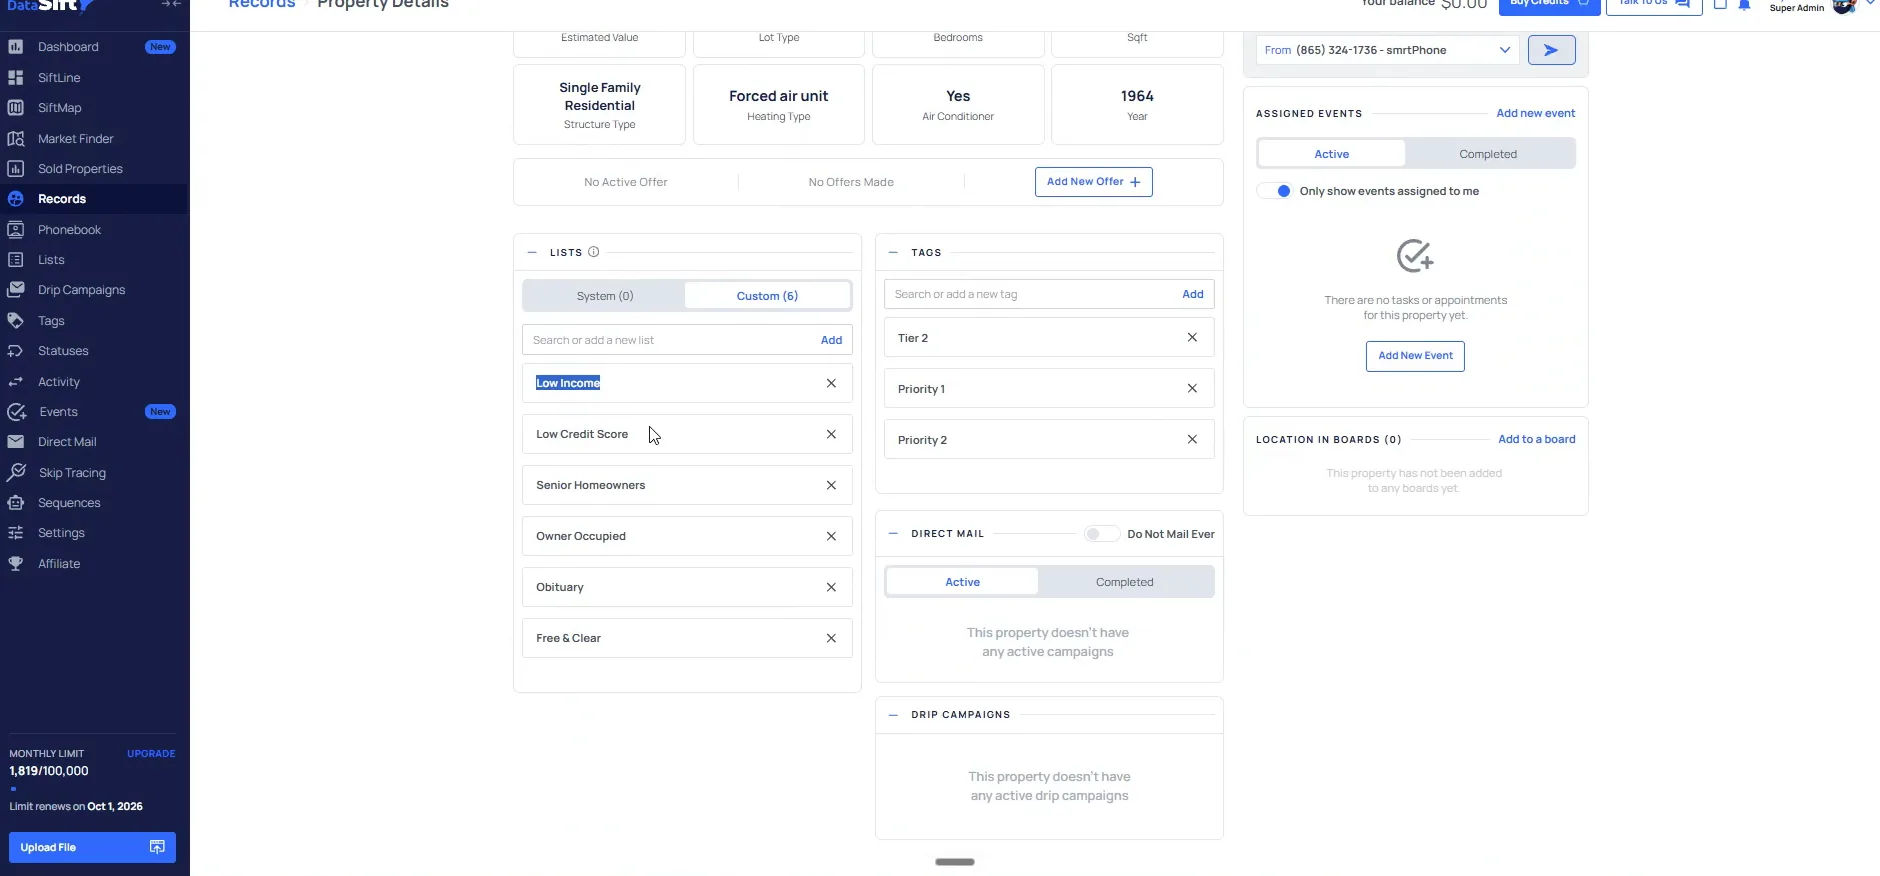
Click property overview and read the Lists and Tags.
This one is low income, senior homeowners, owner occupied, obituary, free and clear. It is on our priority one and two data.
So that means anytime you see two tags like that, it's showing you that at some point, it was priority two and then jumped up to priority one.
BEFORE YOU MOVE ON