
PART 1
Updating data on upload.
My name is Kylie. I'm your customer support ninja at REI Sift. In this video, I'll be showing you how to update property records on upload.
Add data or update data.
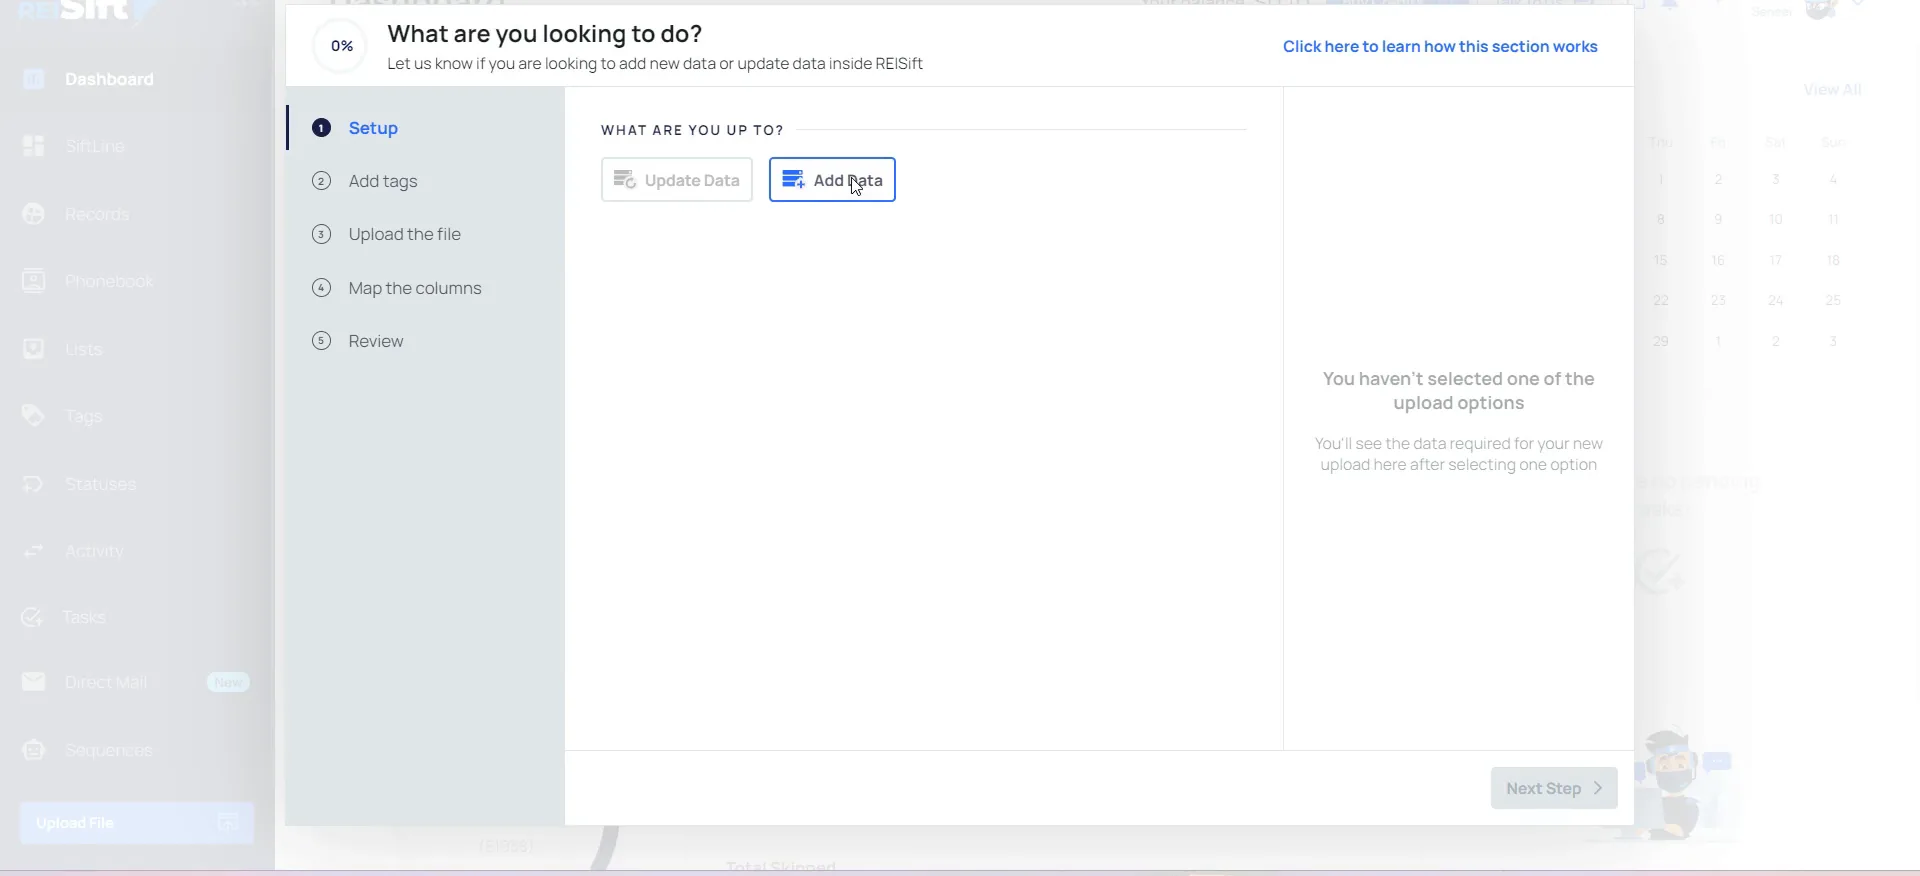
Select add data if your CSV has new addresses.
If your CSV contains any new property addresses, go ahead and select add data. From there you are either uploading a new list not in REI Sift yet, or adding properties to an existing list.
Update data updates existing records, but it does not add new property addresses. If all records in the CSV are already in your REI Sift subaccount, select update data.
This upload option will add new records and update existing with any new list, tags, status, phone numbers, or notes in the CSV.
Pick the match type that fits what you are updating.
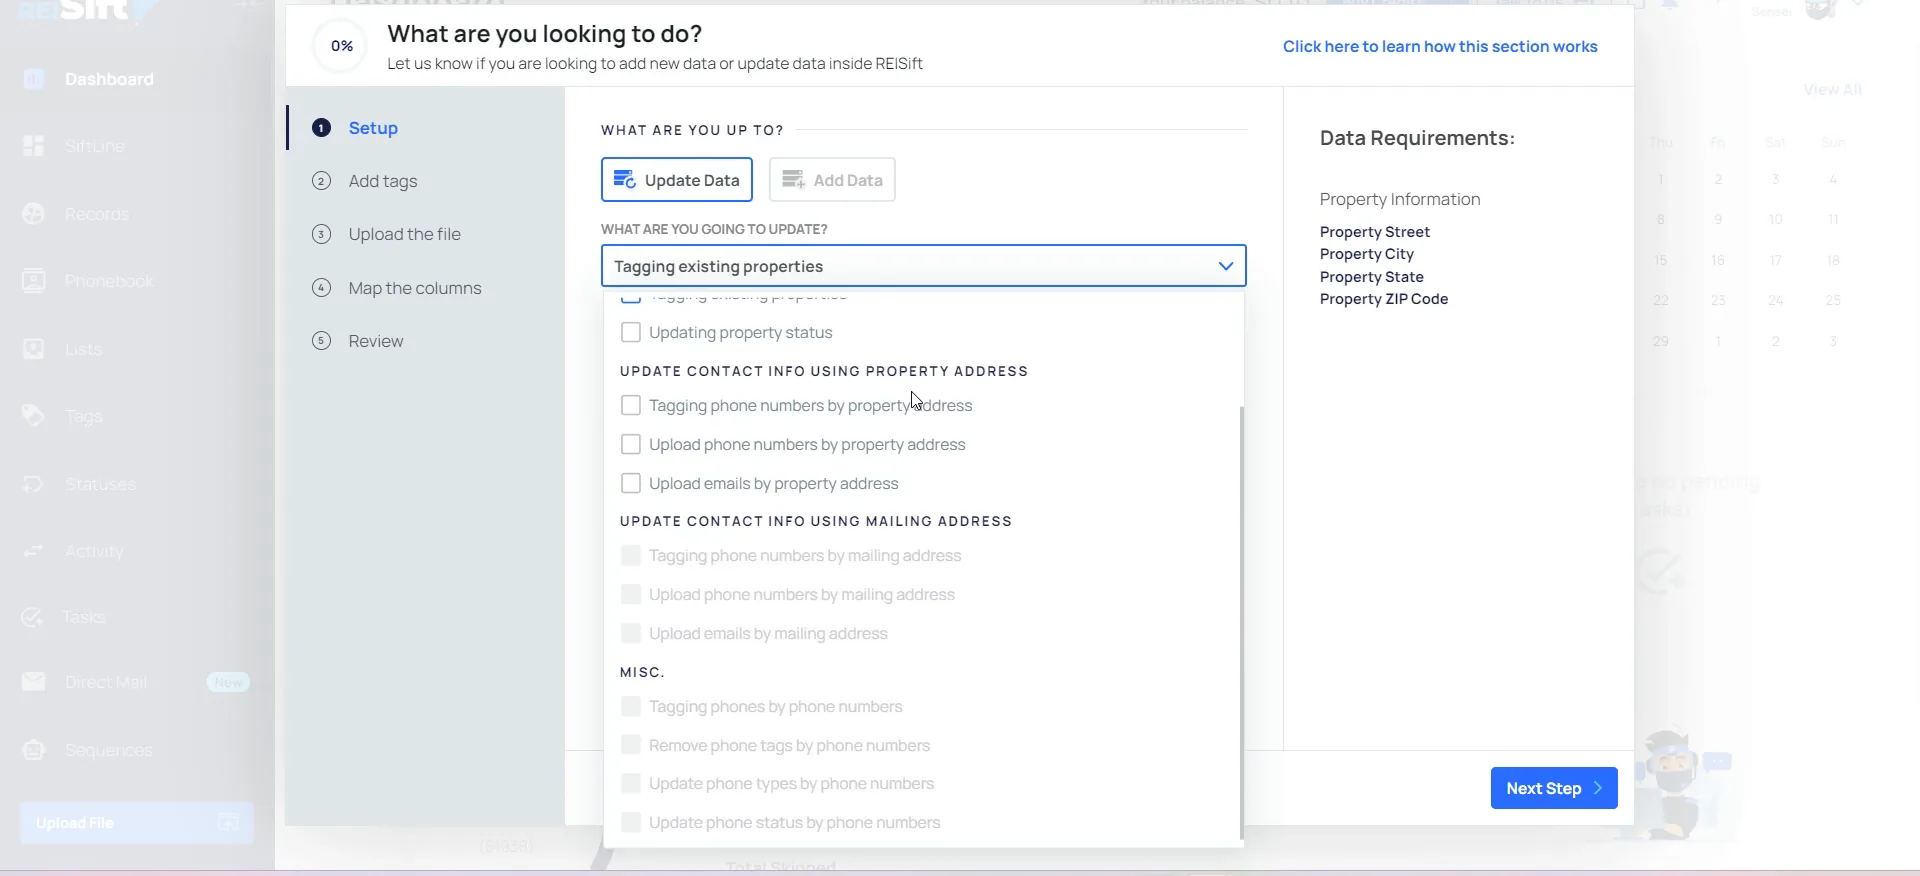
When updating, you can update by property address, by mailing address, or by phone number. Select the option that best matches what you are wanting to update. Tagging existing properties is a general update by property upload option.
With property address, we look for the property address to match what's in your account. Upload phone numbers this way and the numbers still go on the owner record. They also show on any other record with that same mailing address.
With update by mailing, we are looking for the mailing address to match. If it exists in your account, we add the phone numbers to the owner record. They also appear on any other properties tied to that mailing address.
If you're just needing to add notes to the message board or make other general property updates, you can select this option.
Upload options
Add data adds records, update data does not.
Add data
- Adds new property addressesYes
- When to pick itCSV has new addresses
- What it updatesList, tags, status, phone numbers, notes
Update data
- Adds new property addressesNo
- When to pick itAll records already in your account
- What it updatesExisting records only
Add or remove phone tags by phone.
Read the data requirements on the right side.
The miscellaneous update options are the update by phone number options. This lets you add or remove phone tags by phone number, update the phone types, or the property status.
When you select each option, you're going to see the data requirements located here on the right side of the screen. When updating by property or mailing, and you want to add phone numbers, you'll be able to map multiple phone columns.
When updating by phone number under these miscellaneous options here, you're going to need one single column of phone numbers and one single column of phone tags.
Split your columns to match the option you chose.
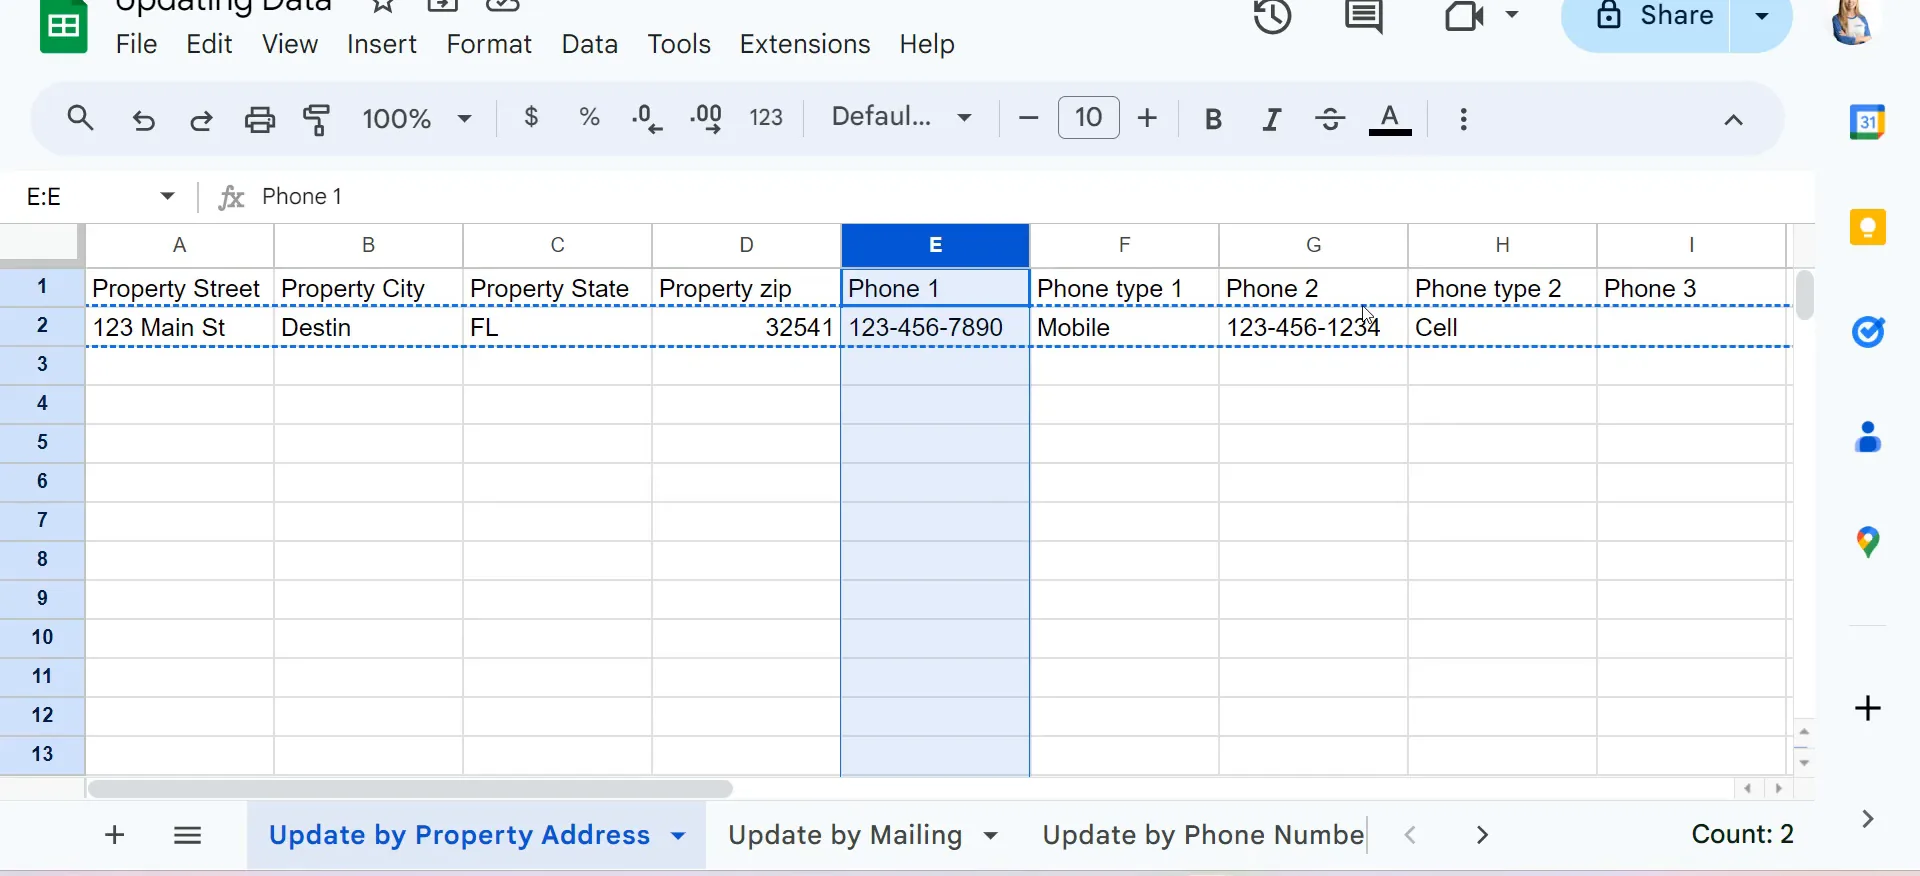
Any update by property address requires the property street address and whichever option you're wanting to update. Say you select uploading phone numbers by property address. You need separate columns for property street, city, state, and ZIP, and we also require phone numbers.
If you have the phone type, you can include that column too and map it on upload. The same goes for a specific phone status or tag. When updating by mailing address, we require the mailing street, city, state, and ZIP, plus whichever options you selected.
Use two columns for the miscellaneous phone updates.
Under the miscellaneous options, we require one single column of the phone numbers and then another column for whichever item you're wanting to update. So if you're updating by phone tag, that is the phone tag column, or phone status, or phone type.
When updating by mailing address, this option does not add property tags. If you select it, you're going to see that the rest of these upload options are not selectable.
BEFORE YOU MOVE ON
PART 2
Update by property address.
Updating by mailing address only looks at the mailing address, so tags and property statuses cannot ride along. This part covers picking the right option, answering the skip trace questions, and mapping your columns. Then we finish the upload and look at what did not go through.
Pick your update options.
Choose update contact info using property address.
That is due to us not having the property address. So when you're updating just by mailing address, we're only looking for the mailing address. No tags list or property statuses can be added to the records with this option.
Say you need to add phone numbers and also update property status. I would recommend selecting the update contact info using property address.
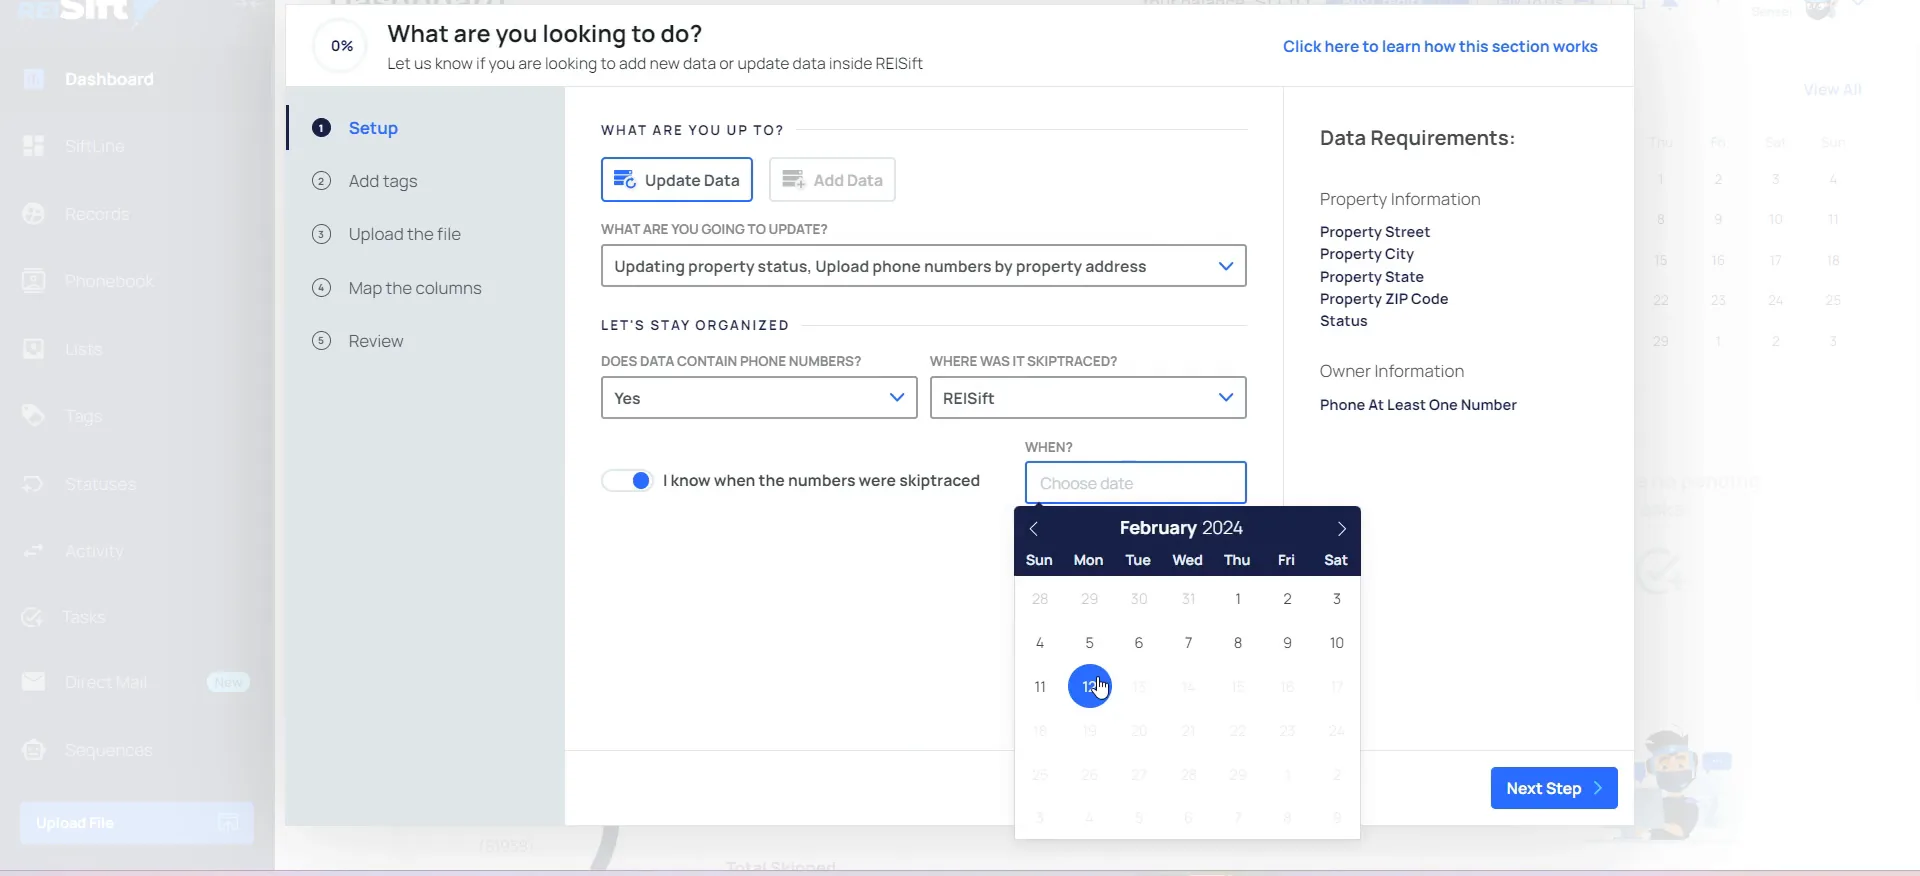
So, for example, if you're wanting to update property status and uplink uploading phone numbers, you can select both options, and we'll see the data requirements here.
Select your skip tracing source and the date.
When uploading phone numbers, we're going to ask when and where the records were skip traced. So you can select the skip tracing source here. If you don't see an option here, you can select other and type in where the records were skip traced.
Next, toggle this section on and select the date they were skip traced. If you forget to select the date here, no worries. You can always update the skip tracing status from the records page.
If you did not select a date here, the skip tracing status will not be applied, so it's going to appear as skip trace never.
Skip tracing date
If you did not select a date here, the skip tracing status will not be applied, so it's going to appear as skip trace never. You can always update the skip tracing status from the records page.
Check your auto tags, then upload the file.
The rest of these options are going to look very similar. When I go to the next step, you can see auto tags were added based on those other selections that I made. For skip tracing, you can add any custom tags here by typing in or selecting the tag.
Next is going to be uploading the file. Here, you'll map the columns. Based on these column headers, we can auto map some of the options here.
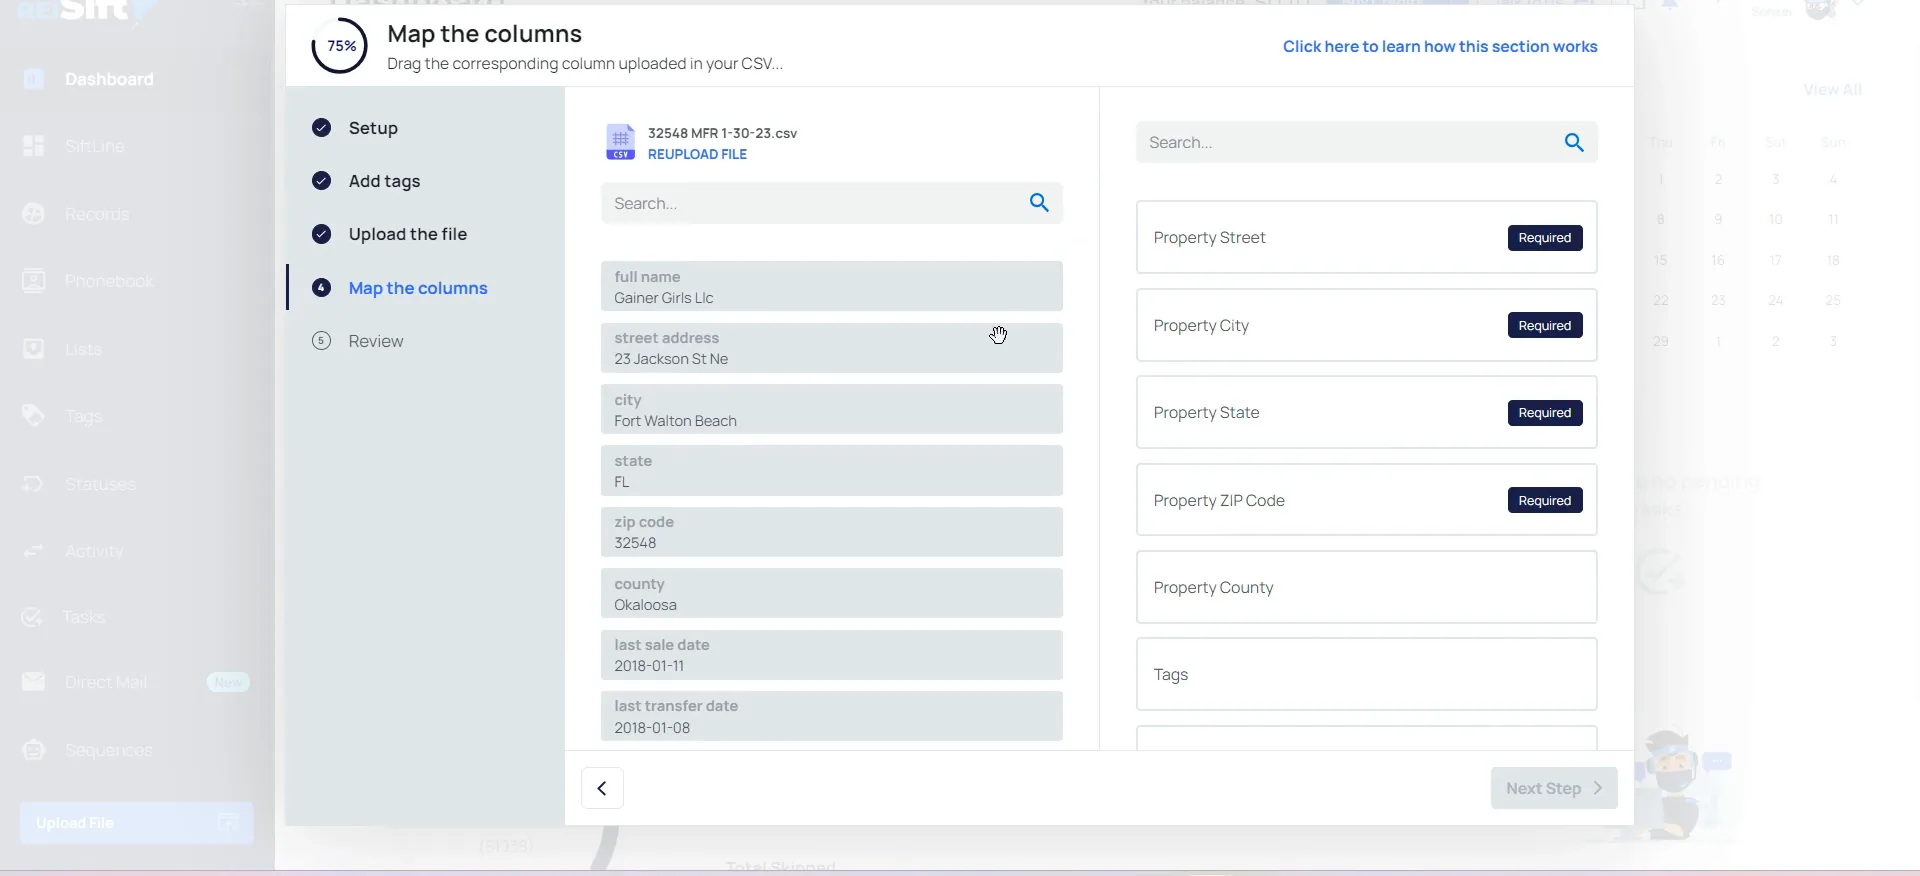
Map, review and finish.
Drag and drop any column that did not auto map.
Due to the way that the property addresses were labeled, it's not auto mapping. So if it doesn't auto map, you can always manually map by dragging and dropping.
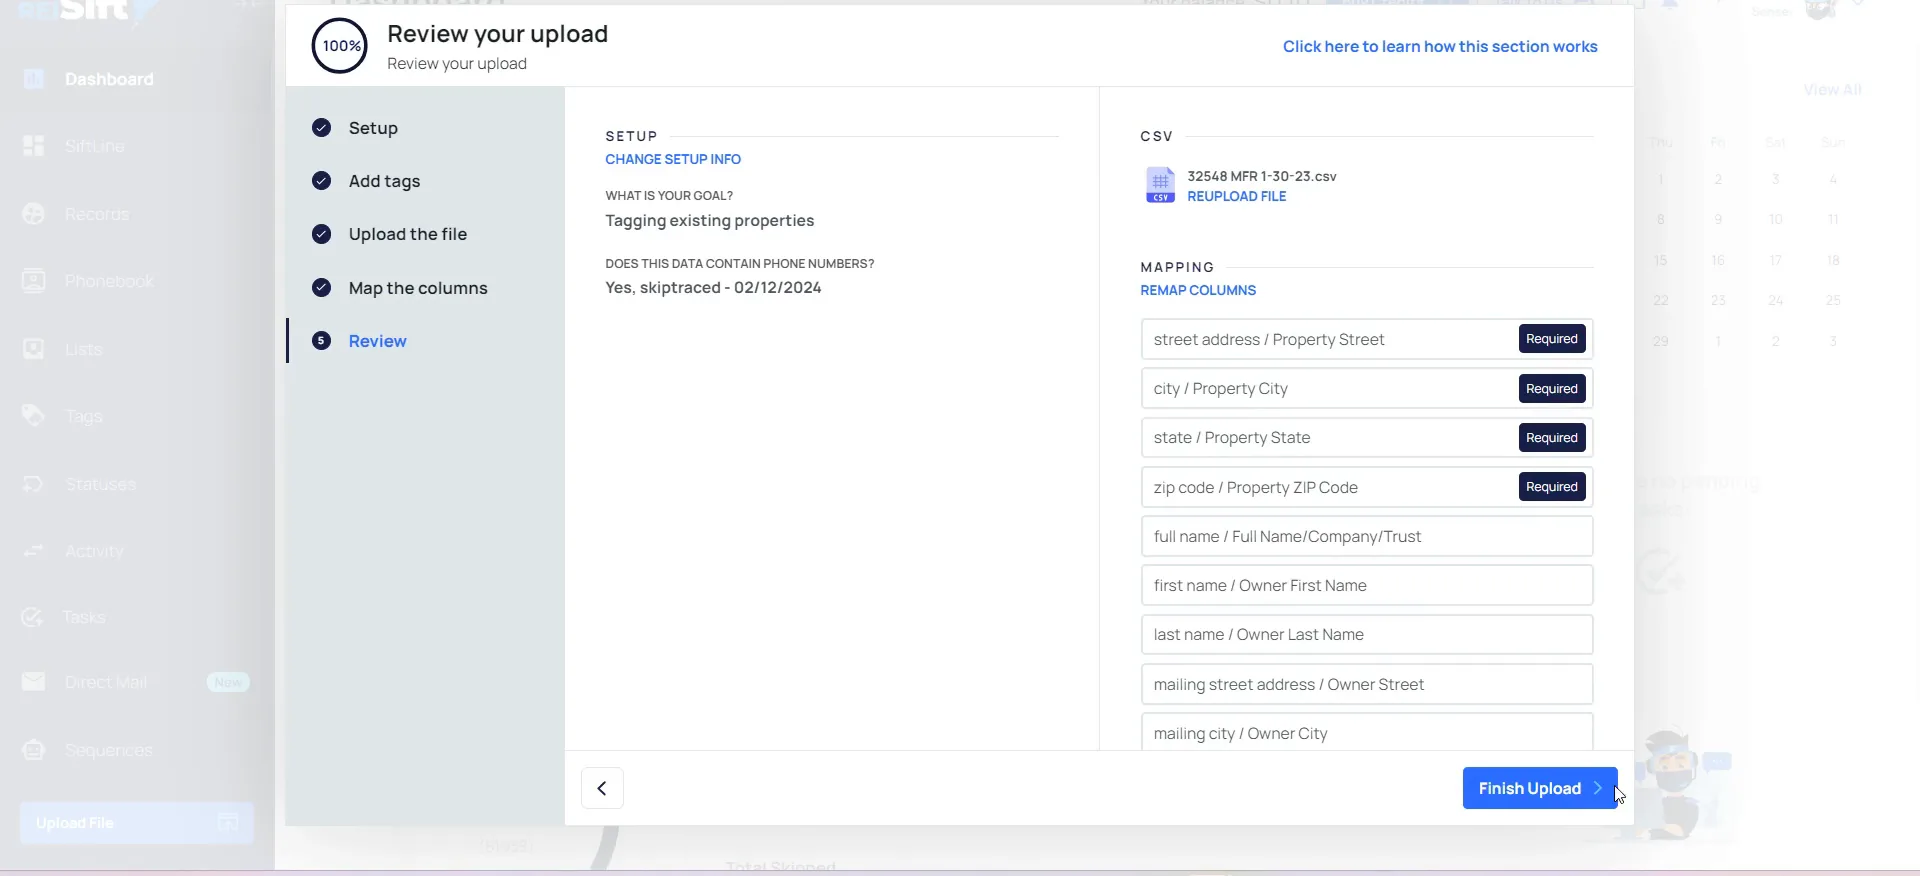
Once you've mapped all columns that you want to include on the upload, click next step. Here you can review. And I'm actually going to go back and remove these tags since I'm not actually uploading any numbers any longer.
Then we can finish upload. If I go to the activity page, we can see that this is processing, and all records were updated.
Check the CSV format when records do not upload.
If you see records that are not uploaded when updating data, it is usually the property address not existing in the platform. Or the mailing address, depending on which option you selected to update by.
If you're uploading skip trace results that you exported, check the CSV file. Some skip tracing providers change the format to the property or mailing addresses occasionally, and we're looking for an exact match.
So if the property or mailing address has changed slightly or they've changed up the formatting, then this could be why you have not uploaded records.
Not uploaded records
Work through not uploaded records in this order.
- 1Check the activity pageRecords that are not uploaded are usually due to the property address or mailing address not existing in REI Sift.
- 2Check the CSV fileSome skip tracing providers change the format of the property or mailing addresses, and we're looking for an exact match.
- 3Reupload by the other optionIf you tried property address and see not uploaded records, reupload using update by mailing and map the mailing address.
Reupload using the other address option.
If this happens and you have both property and mailing, just try uploading by the other option there. So say you try to update by property address and you're seeing not uploaded records. Reupload using the update by mailing and map out the mailing address there.
That's an overview of how to update property information on upload. Be sure to check out our additional upload records trainings in the help center. You can get there by clicking the arrow next to your name and help center.
BEFORE YOU MOVE ON