
PART 1
Custom fields.
No two real estate investment businesses are exactly alike, and that is why we built custom fields. You can tailor your account to your workflow and capture the details that matter most to you. I am Kylie, customer support at DataSift, and here is how to create your own.
Create a group first.
Open settings, then the custom fields tab.
Custom fields are perfect for property investment tracking, estimated renovation costs, acquisition source and HOA contacts. They also work for lead qualification, marketing attributes, the lead source channel, and specifics for foreclosures and auction details.
Select the settings option on the left sidebar of your account, then the custom fields tab. That is where everything in this video happens.
To get started, select the settings option on the left sidebar of your account and then the custom fields tab.
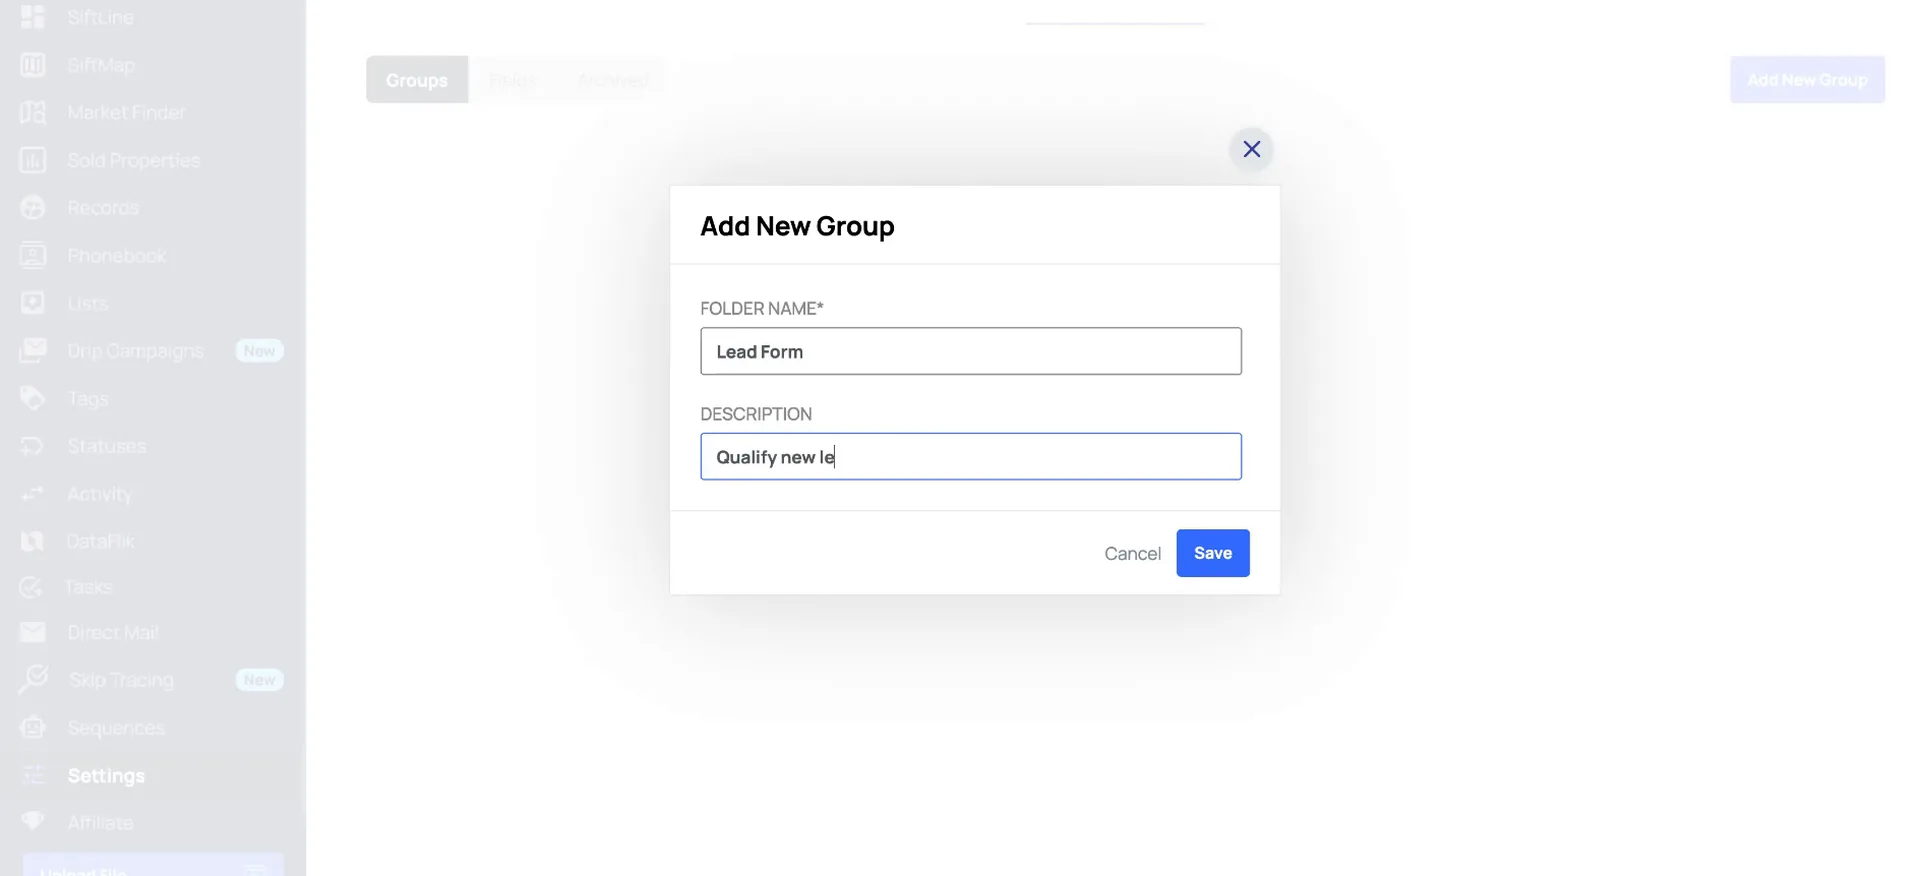
Select add new group, name it, and save.
First we need a group to organize our fields in. In this example I am creating some lead qualification fields, so this group is going to be lead form. Enter the description, then click save.
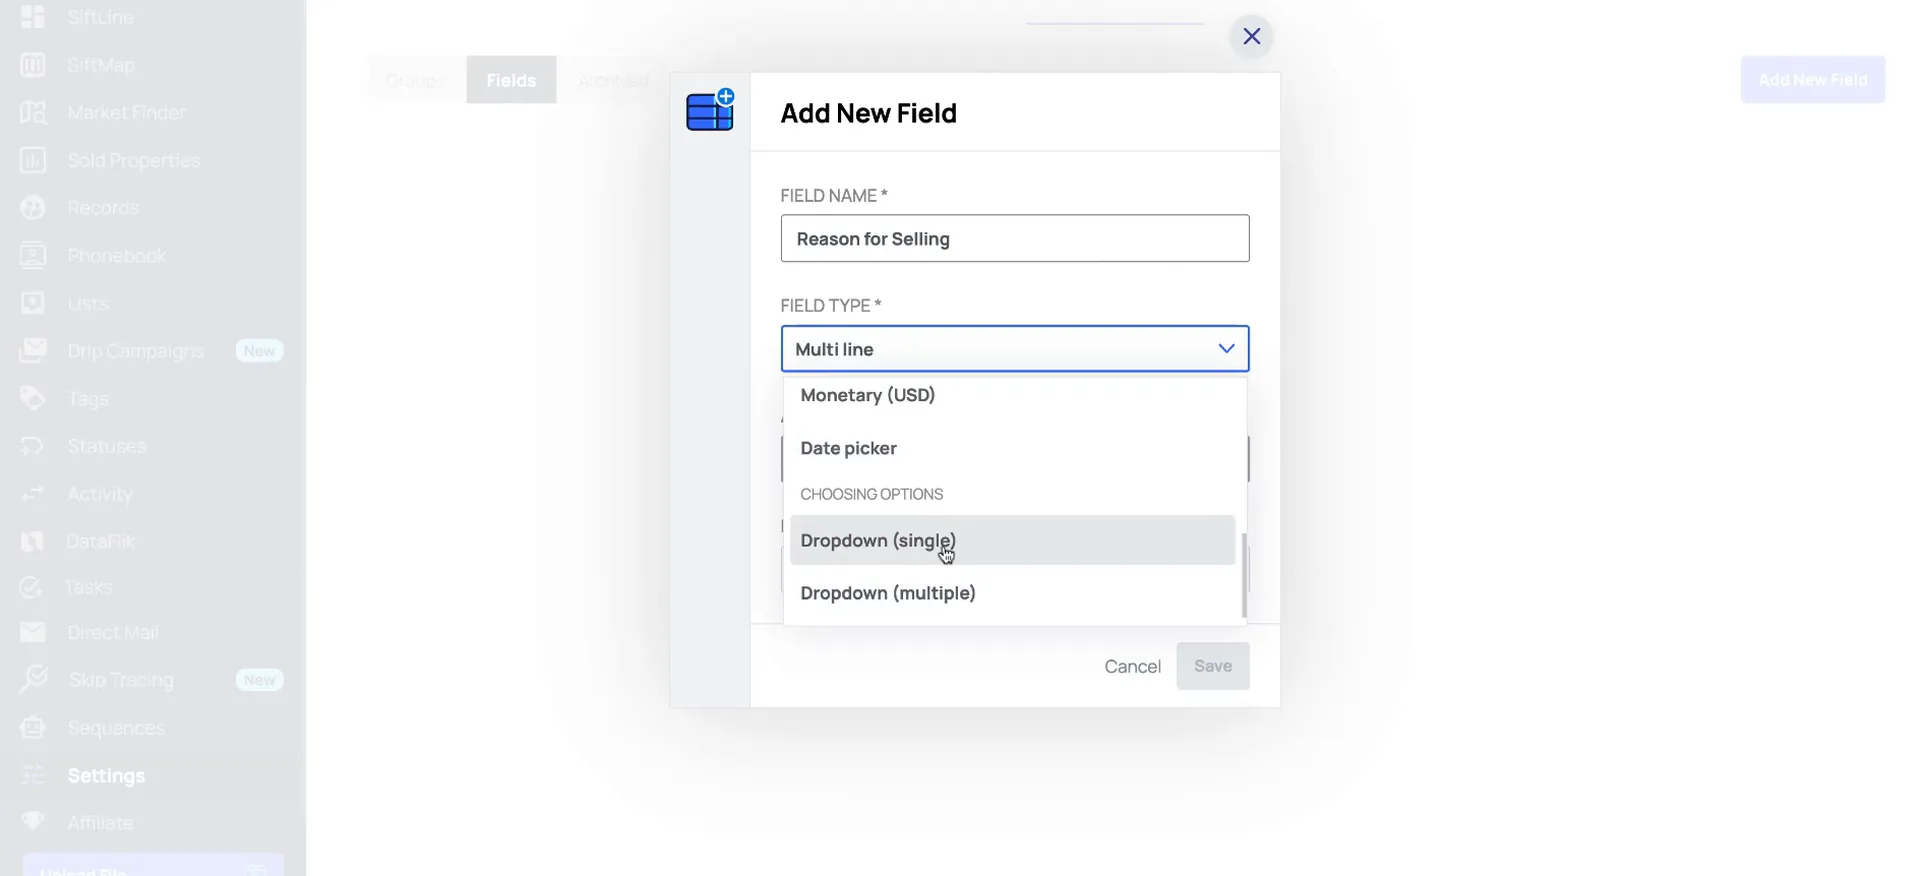
Now that the group is created, we can start adding the fields. Select the fields tab, then add new fields. My first field name is going to be reason for selling.
The field type is where you select what type of input you want the field to be. For most of these on the lead form, they are going to be either single or multiline text.
And since this is a lead form, we're going to enter in some questions that we would typically ask, when we are qualifying a lead.
Choose the field type you need.
Choose the field type that matches your answer.
You can add URL, which would be a web address. You can have checkboxes. If it is going to be any type of values, you would add the monetary option here.
We also have a general number field, a phone number field, and a date picker. With the date picker, when you open up the custom field section within a record, you see our calendar option to select a date.
You can also choose drop downs. Drop down single means you can select only one of the options. Drop down multiple means you can select multiple different options within that same field.
Assign the field to a group, add placeholder text.
Assign your field to a group and then enter the placeholder text. This would be something like a description, and it is also the preview text when you open up the section to fill in the fields.
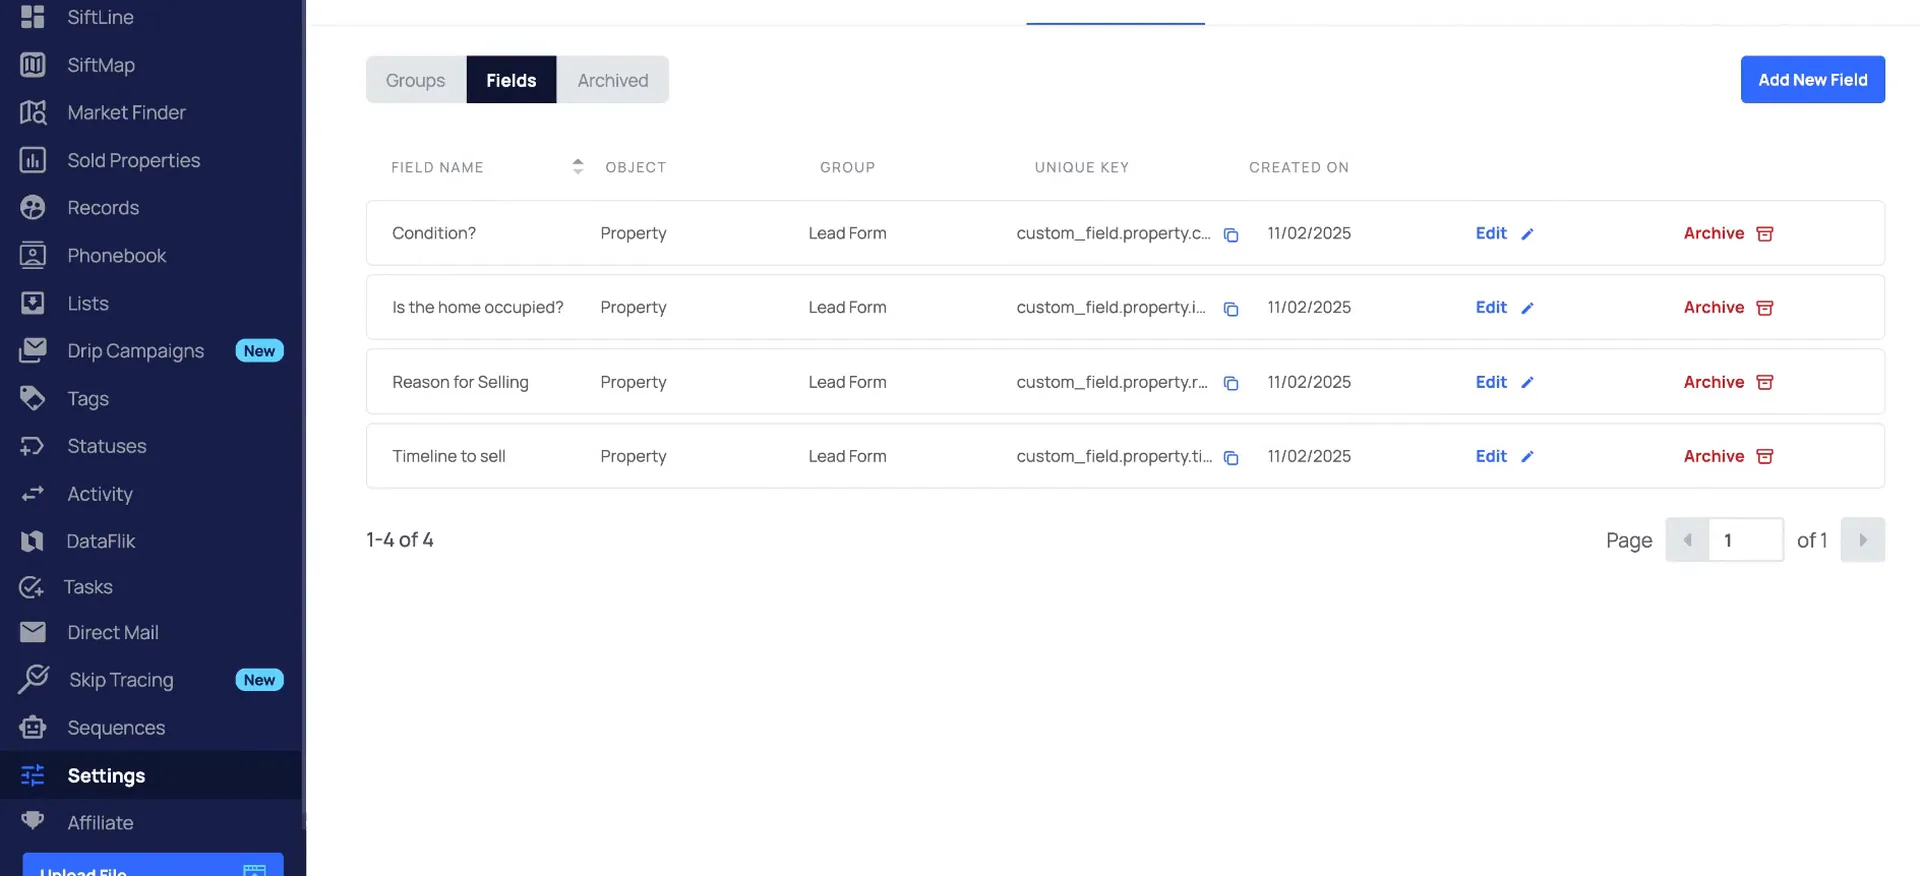
Then save. I am going to add a couple more here. We also want one to ask about the condition.
Assign your field to a group and then enter the placeholder text.
You can edit, archive, and reactivate fields.
Use edit to change a field, archive to retire it.
If you ever need to make changes to a field, just select edit. If you decide you no longer want to use a field, you can archive it.
Any archived fields go under the archive tab. They will not be available to view within the records to fill out any longer.
If you need to reactivate an archived field, just select reactivate here, and you also have an option to delete it from the archive section.
Match your column headers to your field names when uploading.
You can also upload information to custom fields. When you are uploading, make sure the column header matches the field name you entered here, and it will auto map to the correct fields.
You also want to make sure you are uploading the correct data type. For example, if you selected a field type as a number, you would not be able to upload text to that field.
So for example, if you selected a field type as a number, you would not be able to, upload text to that field.
Open a record and fill in your new fields.
Now let's switch over to the records page and see what this looks like within our property records. When we open a record, we have a section for the custom field. Click the drop down here and you will see your fields to complete.
To add in the details, just click the pencil icon. Type in your information and save. Now you can view your very own lead form within each of your records.
And that's it. Check out our help center for more guides. If you have any questions, just click talk to us within your account to open up our support chat.
Records page
Open a record and fill in your fields.
- 1Open a recordOn the records page, open one of your property records.
- 2Click the drop downThe custom field section opens and shows your fields to complete.
- 3Click the pencil iconThat lets you add in the details for each field.
- 4Type and saveYour own lead form now shows inside each of your records.
BEFORE YOU MOVE ON